Creating and Preparing Video Stills for Print
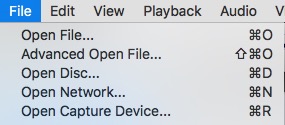
Step 1) Open the video file or DVD Disc you desire to capture a from from in the program VLC. For files choose File > Open, for DVD’s choose File > Open Disc:
If you do not have VLC it can be freely downloaded here:
http://www.videolan.org/vlc/
Step 2) Browse/play the video to the frame you want a still of, and choose Video > Snapshot from the menus:

This will automatically save a PNG file of the frame in its native resolution. The file will be saved into your “Pictures” folder on the computer. The Pictures folder can be found in your main home folder. On our computer lab stations this is called “FDMUSER”.
Step 3: Open the .PNG file in Adobe Photoshop. You can either do this by dragging and dropping the .PNG file onto the Photoshop icon in the Dock, or by opening Photoshop first and choosing File > Open.
Step 4: With the file open in Photoshop, choose Image > Image Size from the menus. In the new window which appears, change the two sections circled in red to match as pictured below. Do not adjust any other fields:
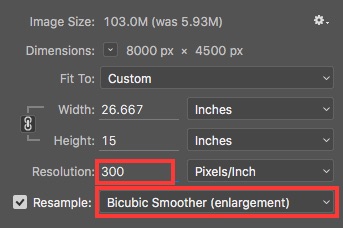
This will help upscale your image to print standards at the best quality possible.
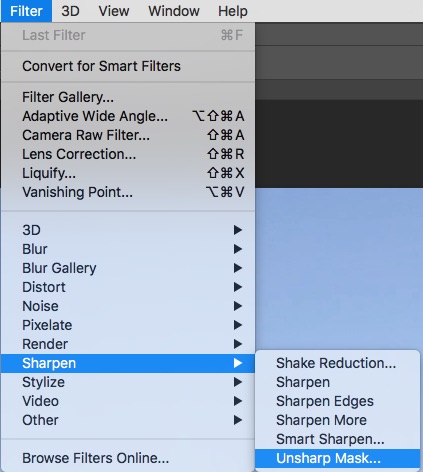
Step 5) Choose Filter > Sharpen > Unsharp Mask:
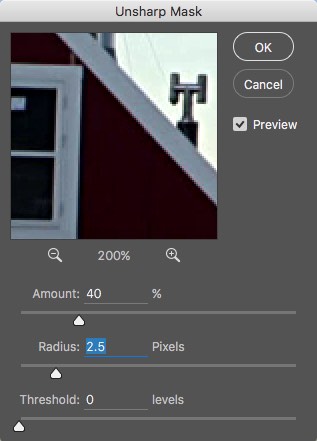
Adjust the settings to these values (or close to them, depending on how sharp you want the printed image to be):
Step 6) Choose File > Save As, and select JPEG (do not select JPEG 2000 or JPEG stereo), and use the settings pictured below:
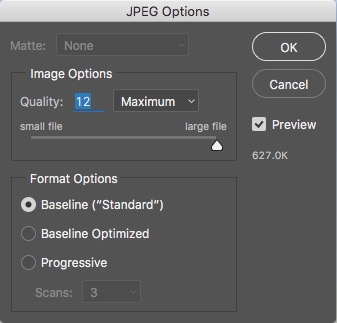
Note: your publisher may instead want a PNG or TIFF file, so it is always best to check with them prior to sending the files. If your publisher prefers a TIFF of PNG file, simply choose that option in the Save As dialog instead of JPEG.

