Recording a Voiceover in Final Cut Pro X
Step 1)
With your external hard drive plugged in, and the project you want to record audio into open, place the playhead in the timeline where you would like your voiceover to start.
Step 2)
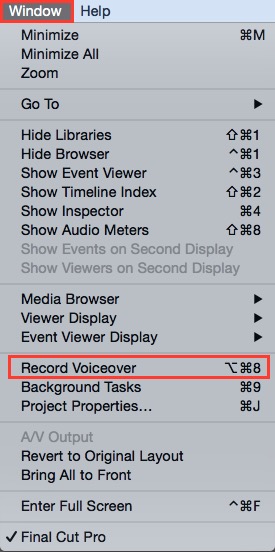
In the menus choose Window > Record Voiceover:

Step 3)
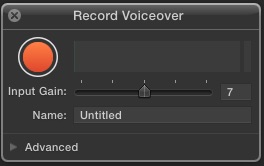
Once you choose the Record Voiceover window the following panel should appear:

We have already configured the microphone settings properly for our space; there is no need to click on “Advanced”. To begin recording into your timeline, simply press the record( ) button:
Step 4)
When you are done recording, click the record button ( ) again to stop, and your recorded voiceover should show up in the timeline as a secondary audio shelf. You should also see a copy of the voiceover in the primary Event which is associated with your project.


