Transcode AVCHD footage to Apple ProRes Using Adobe Prelude CC
This tutorial explains how to use Adobe Prelude to convert (transcode) AVCHD/Camcorder footage into Apple ProRes format.
Important Note: our department computers already have the necessary ProRes presets presets installed for this workflow. If you are using a personal computer, you must first install the Adobe Media Encoder Apple ProRes codecs onto the system you are using. To install these onto your personal computer, you can download them below as a zip file:
Download ProRes Presets for Adobe Prelude/Media Encoder
After you have downloaded them, unzip the file by double-clicking on it. Next, open the Adobe Media Encoder application and choose Preset -> Import from the main menus at the top of the screen. Browse to the presets you downloaded and click “Open”. This will install all of the codecs and allow you to follow this workflow at home.
Before starting a new project, we suggest downloading our Default Premiere Folder Structure Template when starting a new Premiere Project. This can be used to serve as a template for you to insert media into on your hard drive prior to starting a new project which can greatly help you stay organized.
Step 1) Open Adobe Prelude by clicking the icon in the Dock.
![]()
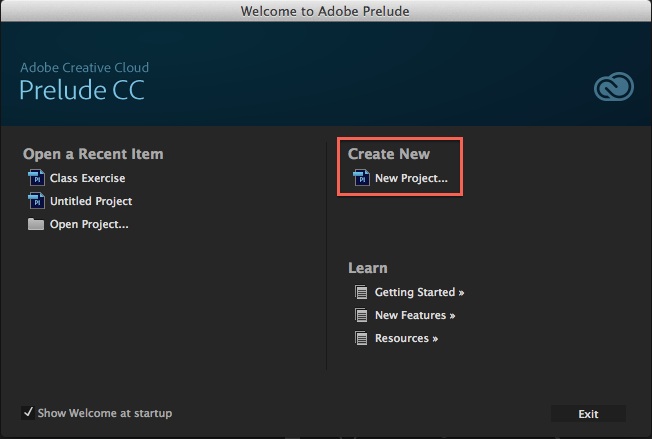
Step 2) When the startup screen shows, click on New Project:
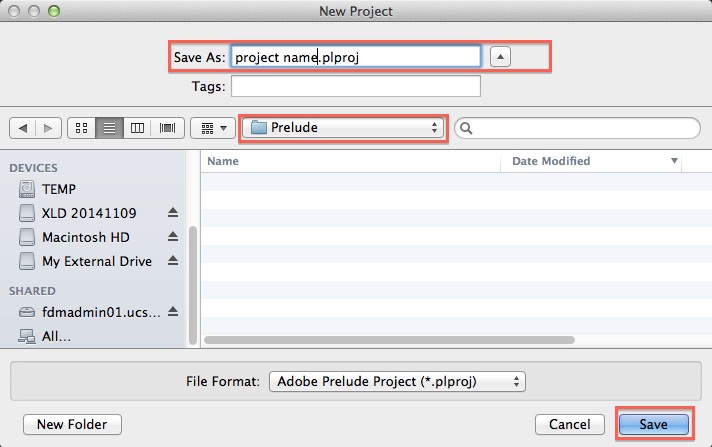
Step 3) When prompted, save this new project file somewhere you’ll remember. Also be sure to give the project file a unique name and not just the standard “Untitled Project”. For this exercise, I set it to my external hard drive in a folder I created called Prelude:
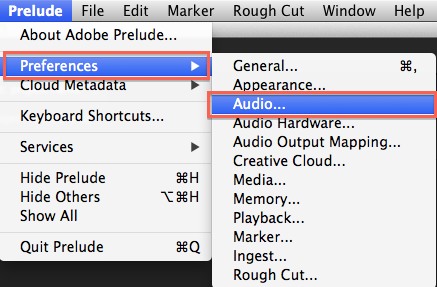
Step 4) Using the top of the screen menus, navigate to Prelude -> Preferences -> Audio:
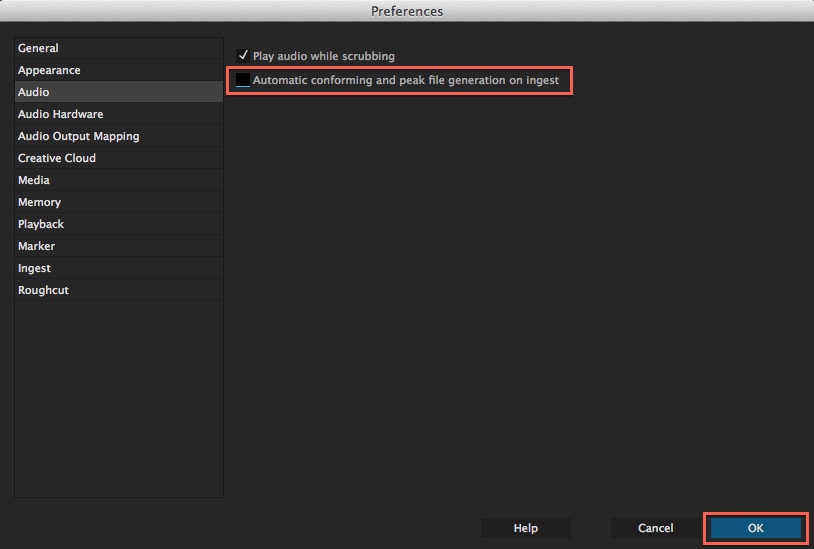
Make sure the check box which reads “Automatic Conforming and Peak File Generation on Ingest” is UNCHECKED, then click OK:
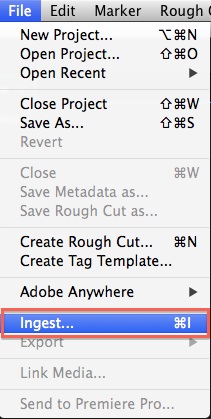
Step 5) Open your ingest window by navigating to File -> Ingest, or pressing Command + I on the keyboard:
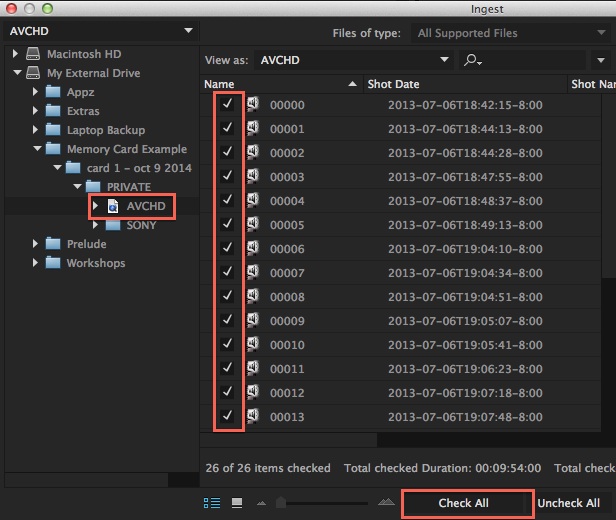
Step 6) Using the left-hand navigation to locate your memory card archive (the media you would like to transcode). Hint: AVCHD footage will typically be in a folder called “AVCHD” within a memory card bundle (see image below). Once you have located the correct media, click “check all” to select all of your clips for transcoding:
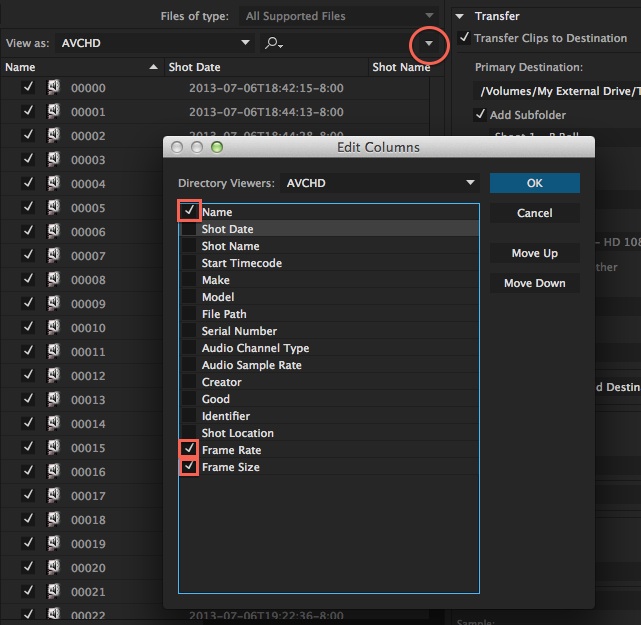
Step 7) Click the Edit Columns button (circled in red below) to adjust the metadata displayed. When the new Edit Columns window opens, check only Name, Frame Size, and Frame Rate and then click OK. This is important to make sure you transcode your clips to the correction version of ProRes which matches your clips:
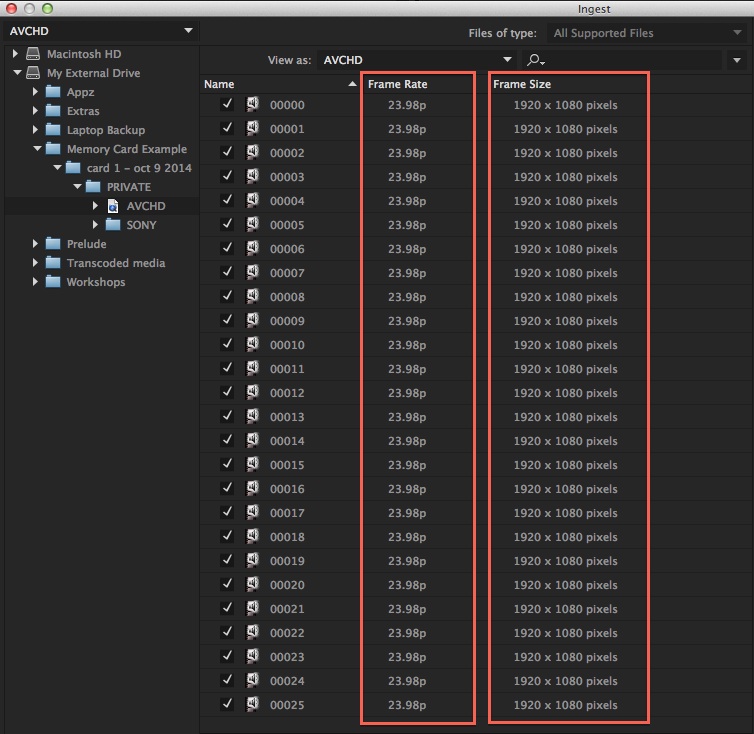
Step 8) Your window should now display similar metadata to this image (note that your frame rate or frame size may be different than pictured, which is OK). Make note of the displayed frame rate and frame size information on your screen because you will need it for the next steps:
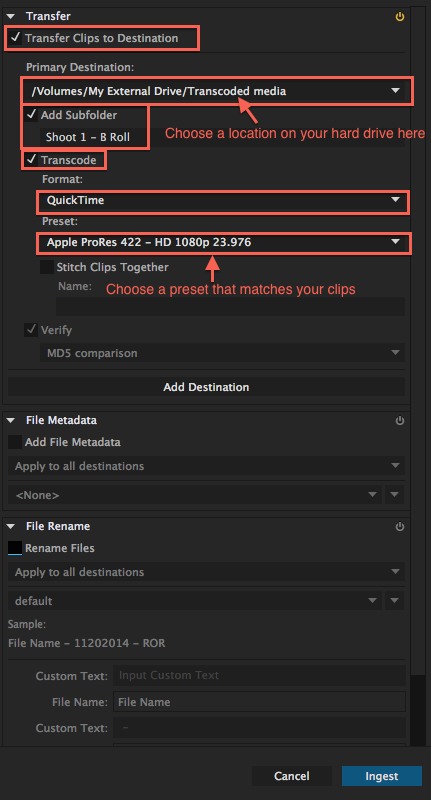
Step 9) On the right-hand section of the Ingest window (The “Transcode” panel) do the following:
a) Check “Transfer Clips to Destination”.
b) Under “Primary Destination” browse to a location on your hard drive where you want the transcoded .mov files to transfer to upon completion.
c) If you would like a new folder made within the location you selected for your hard drive to store the .mov, check the “Add Subfolder” box and give it a practical name.
d) Check “Transcode”.
e) Under Format: choose “Quicktime” ALWAYS.
f) Very important: under Preset: Choose an Apple ProRes 422 – HD preset which matches the information displayed on your clips (as shown in step 8 of this tutorial). In this example I chose Apple ProRes 422 – HD 1080p 23.976 because my clips showed as 23.98p and 1920 x 1080p in the metadata display.
g) Checking Add File Metadata and Rename Files is optional. For beginners of the application, I recommend leaving these unchecked and using the Finder or Premiere itself to rename media after transcoding.
If done correctly, your screen should look similar to this (although your footage may need a different ProRes preset as mentioned earlier):
Step 10) Click on “Ingest”. This will automatically open the application Adobe Media Encoder, and transcode your files. This can take a long time so be sure to budget your time accordingly. Once the items are finished transcoding in Adobe Media Encoder, you can quit Prelude and import the files into your editing software platform of choice.

