Backing Up Film Projects Using Syncovery
This tutorial explains how to use the software Syncovery to perform smart/incremental back ups of film projects from one master/primary hard drive to a secondary/backup hard drive. This software intelligently only copies files which are either missing or newer onto the backup drive from the primary. This same workflow should be followed for the initial (usually longer) backup, and any backups thereafter.
Syncovery is installed on all F&DM department computers. If you would like to have the software on a personal computer, it is available on their official website for $34.90.
Step 1) Open Syncovery by clicking on the icon in the Dock:
![]()
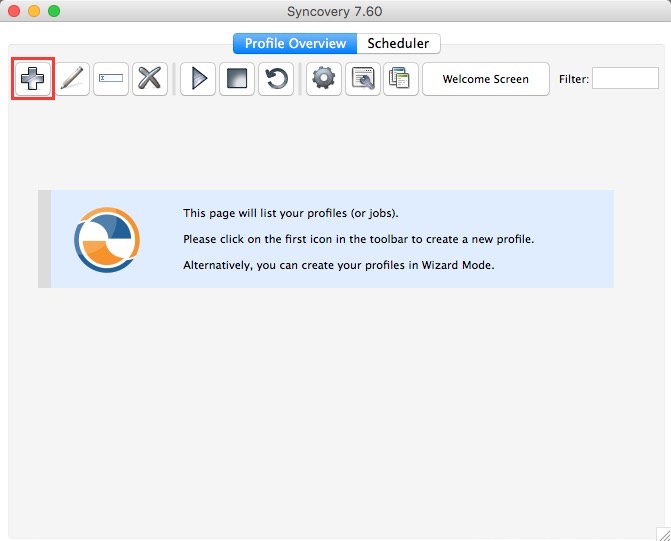
Step 2) Click on the + icon to add a profile:
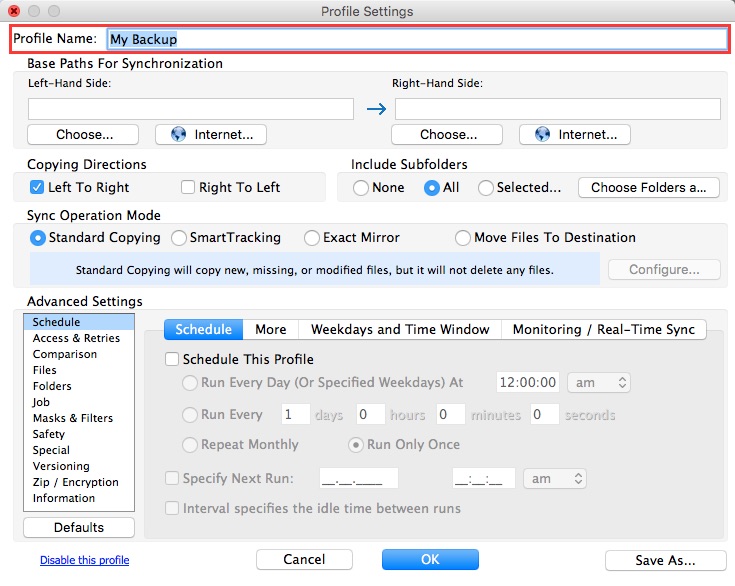
Step 3) Give the backup process a name. In this example I simply used “My Backup”:
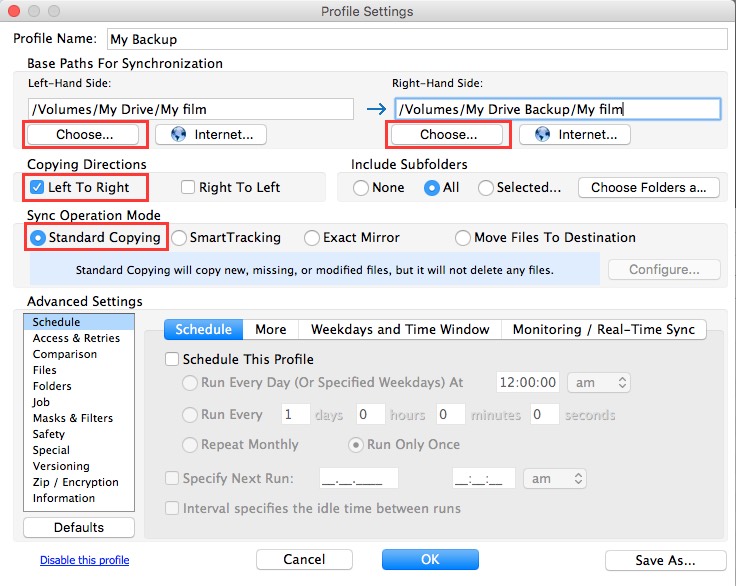
Step 4). Setting up a backup involves choosing a left hand location (primary drive) and right hand location (backup drive).
Click Choose on the “Left-Hand Side”, and when a new window opens, browse to the location of your film’s folder structure on the primary drive. Next, for the “Right-Hand Side”, click Choose, and this time browse to location for the film on the backup drive. Verify that the paths for the left side (primary drive) and right side (backup drive) look correct.
Also, to avoid doing any accidental deletion, please verify that the Copy direction is “Left to Right” and that “Standard Copying” is the Sync Operation Mode. You configuration should look similar to this but with your hard drive and folder names listed instead:
Step 5) Click “OK”:![]()
Step 6) You will now be in the main window of the application. To start the backup, Right-Click anywhere on the profile (light purple area), and choose either “Run in Attended Mode”, or “Run in Unattended Mode”:
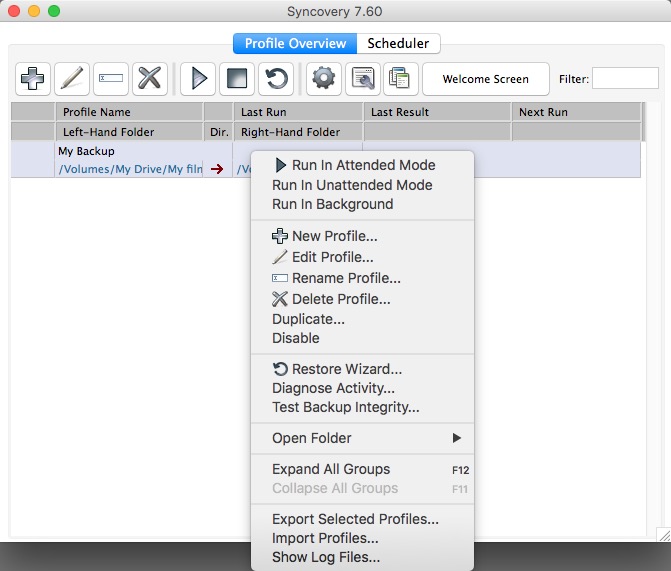
Run in Unattended Mode (generally preferable)
This option is more automated and will immediately kick off a backup. There will be a progress bar showing the files being copied, and the time remaining: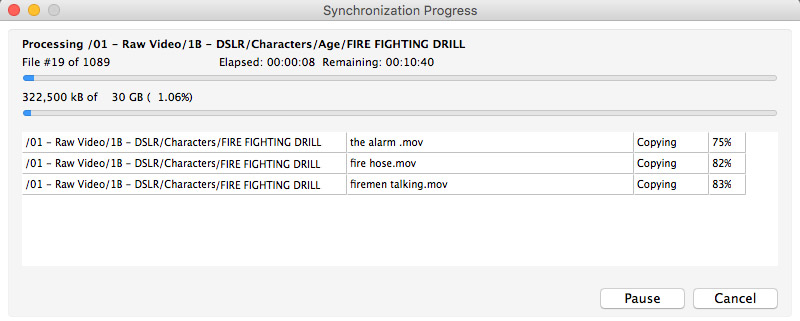
Run in Attended Mode (more cautious)
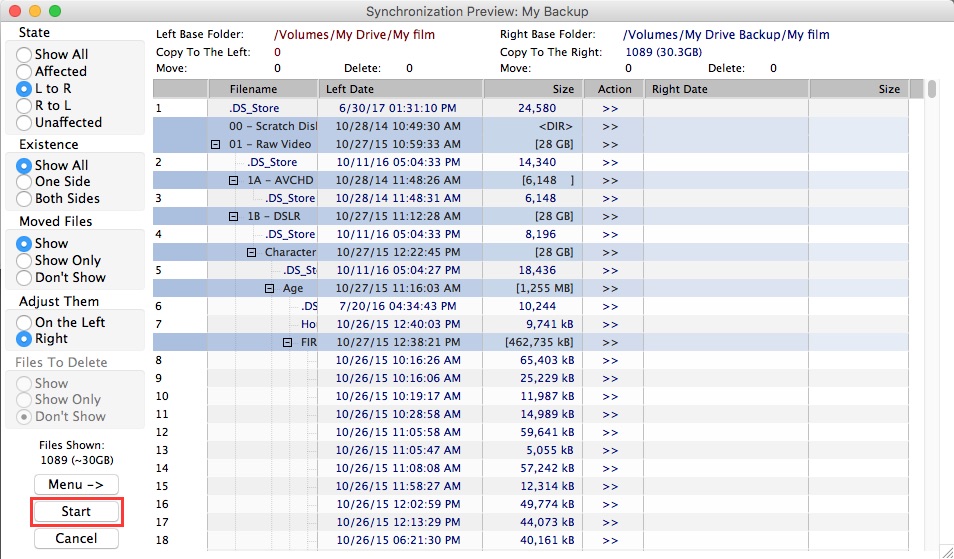
This is the best option if you’re concerned about potentially overwriting data which already exists by mistake. This method is more sensitive about if files have size or time stamp discrepancies and may also ask for confirmations about certain files being copied from the user while it backs up. In this mode, a new window will pop up, and if you are fine with the list of files, you should click “Start” to initiate the backup:
Step 7) Once either backup method is completed it will show a summary of the copy. If for some reason it lists any errors, you can click the Log Files button to review what files, if any, failed to copy:
![]()
This can be helpful in determining if any files from your primary drive have corruption. Generally, if a file won’t copy in Syncovery, it has some corruption.
If you require any help please email fdmoperations@ucsc.edu for technical assistance.

