Transcode Found Footage/Phone Footage to Apple ProRes with Adobe Media Encoder
This tutorial explains how to convert movie clips to Apple ProRes using Adobe Media Encoder.
This technique can be used to resolve the following three common Adobe Premiere post-production problems:
- Normalizing a “variable” frame rate video file where audio syncing issues occur in Premiere from using footage captured with a modern cell phone.
- Converting any “found footage” (footage sourced from the Internet or an unknown source) to a format that Premiere can understand.
- Resolving audio sample rate issues when a video file has an audio stream that is 44.1kHz instead of the default of 48kHz. Note that this problem is inherent to almost all found footage and footage captured on cell phones.
Step 1: Open Adobe Media Encoder. Media Encoder is included with the Adobe Creative Cloud all apps plan, but you will need to download it if you have not already done so:

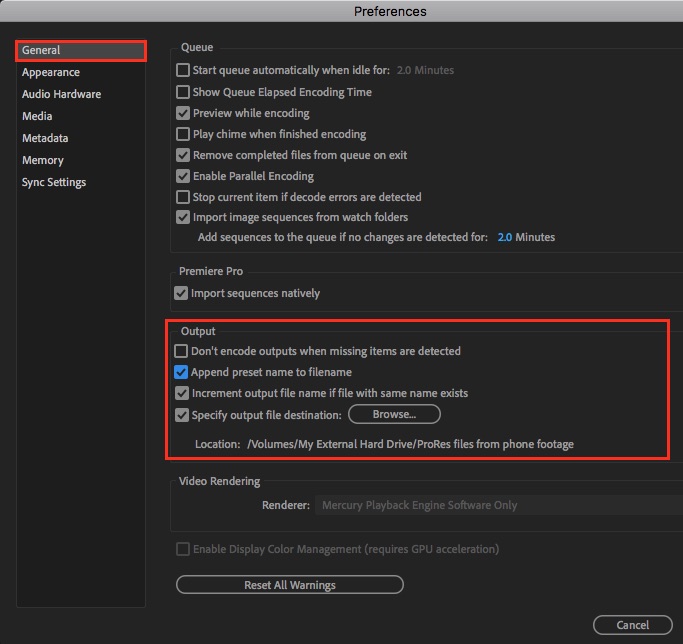
Step 2: Navigate to the menu Media Encoder > Preferences. Note that in Windows this will be under Edit > Preferences:

In the General settings, check the box that says “Append preset name to filename”. It is recommended that you also check the box for “Specify output file destination” and then click Browse and choose a preferred destination (folder or location on a hard drive) for your converted media to go to. Otherwise, it will go to the same folder it came from with a new name. In this example a location on an external hard drive was chosen. When you are done with these settings click OK.

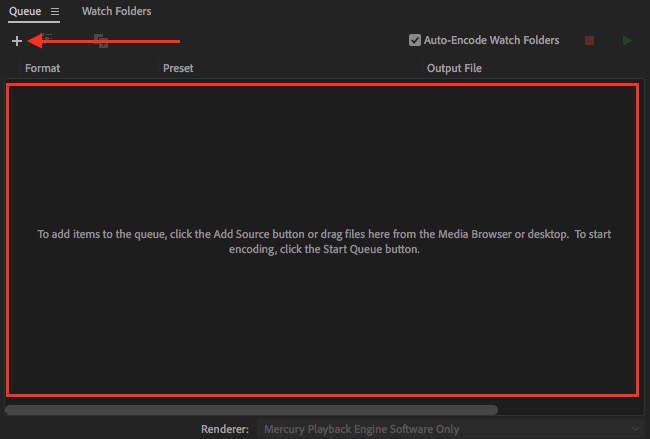
Step 3: In the top right (Queue) window, bring in one movie file by either clicking on the + icon to browse to and select it, or by dragging and dropping the file directly into the area shown outlined below:

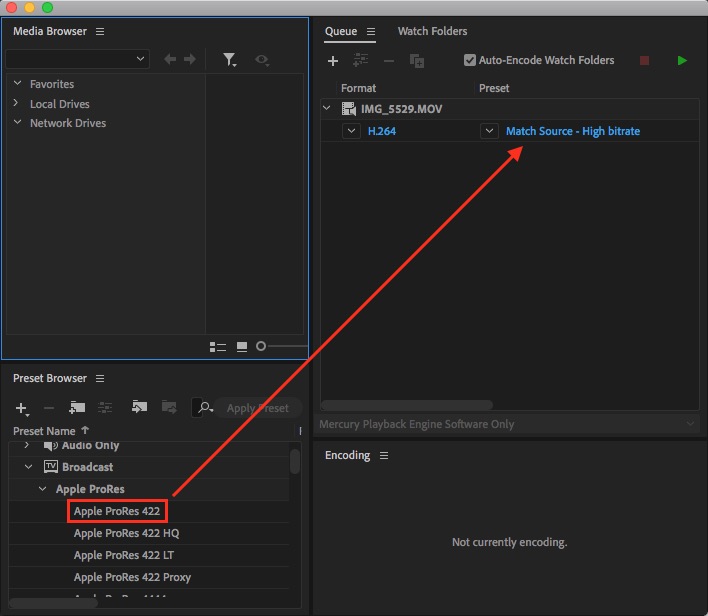
Step 4: The Media Encoder presets are located in bottom left of the screen. Browse to System Presets > Broadcast > Apple ProRes > and choose either ProRes 422 or ProRes 422 LT. ProRes 422 is higher quality but takes up a lot of hard drive space. If you are concerned about hard drive space or can only work on an internal laptop hard drive then selecting ProRes LT would be the most practical choice. Drag and drop the preset onto the clip (where the blue text is) within the Queue window on the top right of Media Encoder:

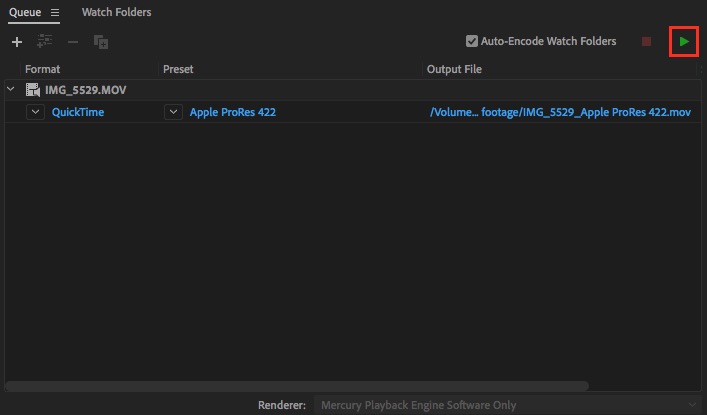
Your movie file should now list Apple ProRes 422 (or 422 LT if you selected that preset) below the clip name. If you are ready to start converting the file you can click the green Start Queue button which will start the file conversion:
Batch processing many files: If you need to batch process many files, follow these same steps listed above (starting by adding just one movie file). After you have imported your first movie file and applied the ProRes preset, before starting the Queue, add the rest of your movie files. Any movie files added to the Queue after your first one will by default inherit the Apple ProRes preset setting that you chose for them. Media Encoder always remembers the last preset you used for any new incoming files. It is recommend to not convert more than 40 clips at a time to avoid having Media Encoder stall/crash.

