
Advanced Background Noise Removal In Adobe Audition (Round-trip from Adobe Premiere)
This tutorial will help guide you through how to reduce noise using the “round trip” to Audition feature built into Adobe Premiere. For this tutorial you will need Adobe Premiere and Adobe Audition installed. Adobe Audition is included with the Adobe All Apps plan and if you are working on a personal computer you may need to download it if you have not done so already.
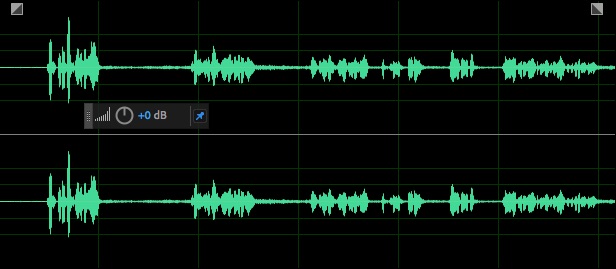
Important vocabulary term. In this tutorial audio waveforms are references as a term. This is a visual diagram that represents the audio signal in terms of the range of amplitude oven the given length of an audio file. This is an example of an audio waveform in Adobe Audition:
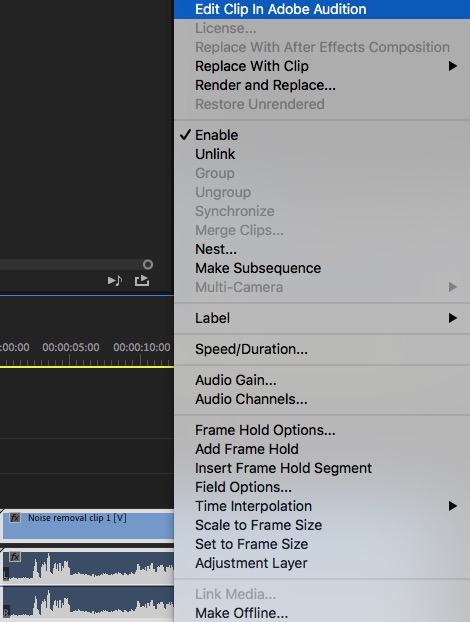
Step 1: With your movie clip (or audio file) loaded and in your Premiere sequence, right click on it and choose Edit Clip In Adobe Audition:
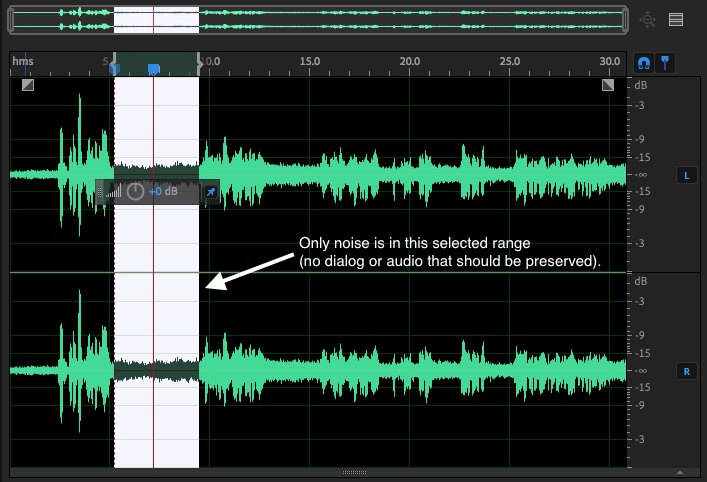
Step 2: Adobe Audition will open and automatically load the file from Adobe Premiere. To start, click anywhere in the audio waveform area and press the space bar to play and pause the audio. Find somewhere in the audio where you only hear the “noise” you would like to reduce without any talking or audio you would want to remain in the clip after the noise reduction is complete. Once you have found somewhere that only the noise exists, click and drag (left to right) on that area to select only it. You can press the space bar with this range selected to play that area only and confirm you only hear the noise:
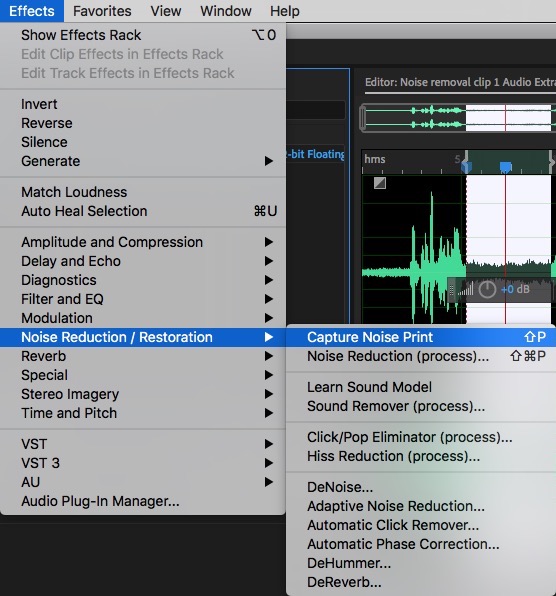
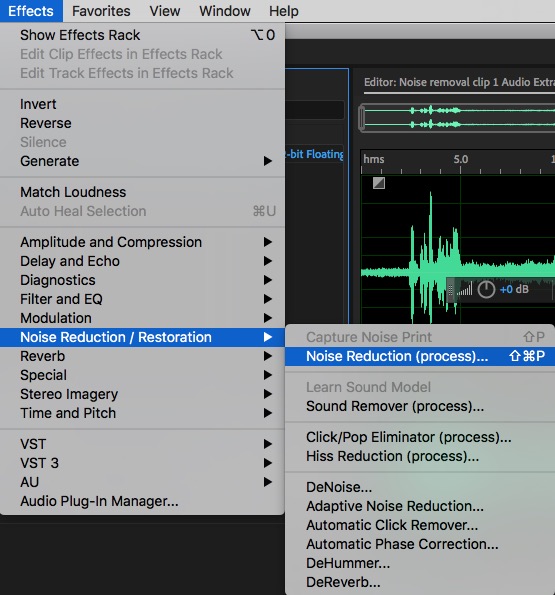
Step 3 (Capture noise print): With the noise range selected, navigate to the Effects menu, and choose Noise Reduction / Restoration, and then choose Capture Noise Print. Because we have only selected noise in the previous step, this will tell Adobe Premiere exactly what noise we are trying to remove in the next step:
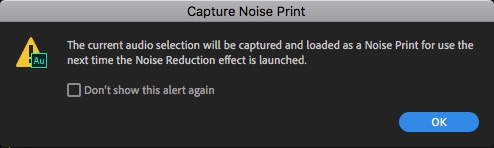
You may see this extra window pop up. It is just confirming that the selection you have chosen will be used to define the noise print which is what you want. You can simply choose OK to this:
Step 4 (Apply noise reduction): Click anywhere in the audio waveform area to remove (deselect) your previous selection. Navigate to the Effects menu again, choose Noise Reduction / Restoration, and then Noise Reduction (process)…
In the new Noise Reduction window that pops up, click the loop button as shown in the graphic below, as well as the power button (if it is off). Next, press the space bar, or click the play button (between the power button and loop button). This will play the audio and allow you to hear the noise reduction in real time:

Now you can adjust the “Noise Reduction” and “Reduce By” sliders to try and eliminate the noise without making the audio you want to preserve degraded. This can take some time to find the perfect spot where the noise is reduced without sacrificing the audio quality of the clip.
The Noise Reduction slider will adjust how much the noise is being reduce by (percentage). The Reduce By slider will adjust how much DB (decibels) to reduce the noise by.
Generally, for most situations, somewhere between 50 and 70 for Noise Reduction, and 10 to 20 for Reduce By will be the adequate for noise reduction.
When you are satisfied with the noise reduction, press Apply.
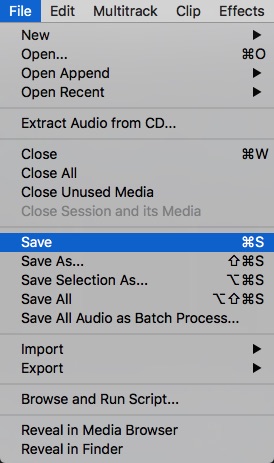
Step 5: Navigate to the File menu in Adobe Audition, and choose Save:
You can now navigate back to Adobe Premiere. If you are finished using Adobe Audition, you can now quit it.
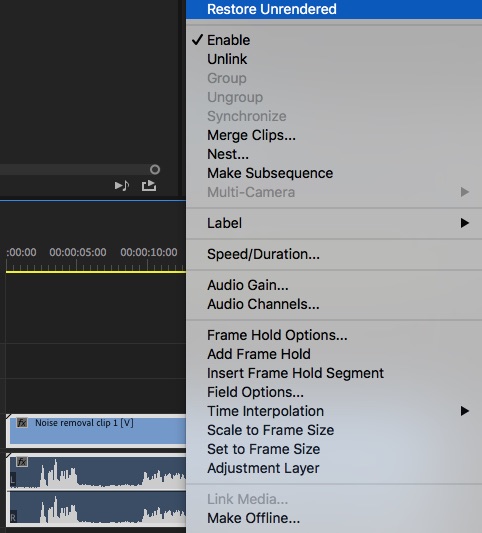
Step 6: In Adobe Premiere your audio for that section will now be replaced with the content from Adobe Audition. If at any point in the future you review the file and decide that you are unhappy with the noise reduction you applied, you can simply right-click on the clip and choose Restore Unrendered. This will bring back your original audio before you sent it to Audition:
Please note that this workflow also works for standalone audio clips, such as audio recorded on a field recorder. This tutorial simply used a .mov camera file with audio attached to it as an example.