
Converting Audio Sample Rates in Adobe Audition
This tutorial will show you how to convert the audio sample rate of a file in Adobe Audition. In this example we are converting a single channel (mono) 44.1kHz mp3 file to a 48kHz wav file to match video footage recorded on a camcorder. However, this tutorial can be used to convert the sample rate of any audio file or video file with an attached audio stream.
For example, if you filmed an entire movie on a modern cell phone, rather than a camcorder, all of your video footage will likely have audio that has a 44.1kHz sample rate. You can then use this same workflow shown here to change any other footage or audio files to 44.1kHz to match the cell phone footage.
To follow this tutorial you will need Adobe Audition installed. Adobe Audition is included with the Adobe Creative Cloud All Apps plan. If you are working on a personal computer you may need to download it if you have not done so already.
Step 1: Open Adobe Audition by clicking on the icon for the application:
![]()
Step 2: Navigate to the File menu and choose Open:

In the new window that opens, browse to the file you want to convert, select it, and click Open.
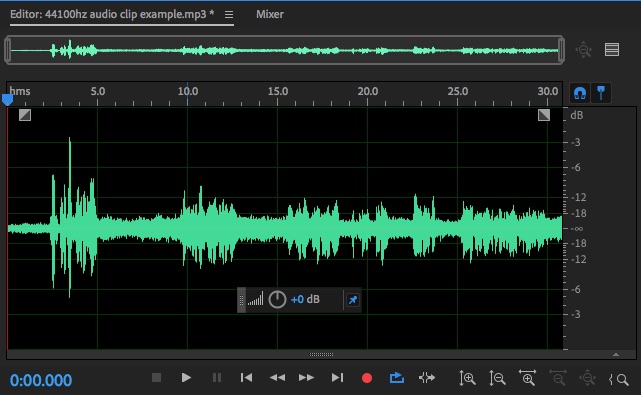
If the file opens successfully, you should see the audio waveform appear in the main part of the Audition “Editor” interface:
Step 3: With your file now open in Audition, navigate to the Edit menu, and choose Convert Sample Type:

In the following window that opens enter the sample rate you would like to convert to in the Sample Rate field, and then match the rest of the settings in this screen shot below. When you are done click OK:

Your audio file will now be converted to the sample rate you chose.
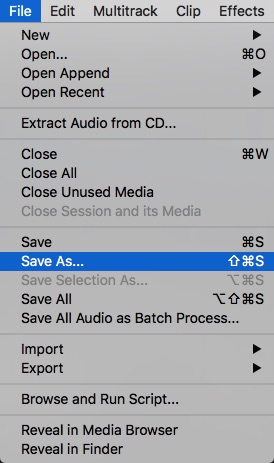
Step 4: Navigate to the File menu and choose Save As:
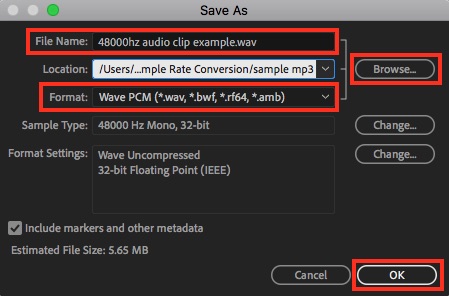
In the the new Window that opens type the file name you would prefer in the File Name field. Next click on Browse to specify that location you would like the newly converted file to be saved to. Next, choose WAV PCM as the Format option. Do not worry if the rest of the fields match the screenshot exactly as below; the rest of the settings will default to match the properties of your clip and create a file that will work well in video editing applications. When are you finished, click OK:
If you are finished converting files you can quit Adobe Audition. If you plan to convert more files, it is recommended to first navigate to the File Menu, and choose Close All. This will help minimize the confusion of having multiple audio files open at the same time:
