
Exporting a JPEG Still (Single Frame Image File) in Adobe Premiere
This tutorial will show you how to export a single still image as a .jpg file from a project in Adobe Premiere.
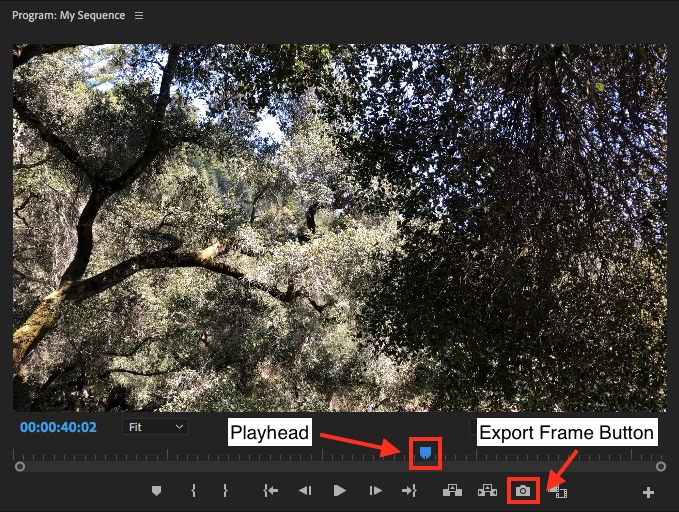
Open your project file and current sequence (timeline) in Premiere. Navigate to the Program panel (typically located in the top right-hand section of the Premiere interface). Using the mouse, drag the blue arrow, also known as the playhead, to the exact frame you wish to export (shown below). Next, click on the “Export Frame” button in this panel (as shown below):
In the new window that opens, give the still a name in the Name field. For Format choose JPEG. Next, click on Browse button to choose a convenient location where the still will be saved. In this example it is being saved to an external hard drive:

Click OK and the still will be saved.