Formatting External Hard Drives (Windows 10)
These three tutorials will help guide you through how to format an external hard drive in Microsoft Windows 10.
Warning: all tutorials on this page will erase ALL data on the external hard drive. If you plan to format a drive containing important data, make sure you have a complete copy of it on another device.
First, unplug all external hard drives and flash drives except for the one you wish to format. The interface can be confusing, so this is very important to avoid formatting the wrong hard disk drive and potentially losing any data that is important.
Next, open the Disk Management Utility in Windows 10 by right-clicking on the Windows icon (Start Menu) in the lower left-hand side of the screen and selecting “Disk Management”:

Next choose one of the following tutorials to follow based on your situation:
- The tutorial linked below should be chosen if you bought a new hard drive, or if you have been advised to re-format your hard drive for compatibility reasons due to the limitations of the EXFAT or FAT32 filesystems:
- The tutorial linked below should be chosen if you bought a new hard drive and when you open the Disk Management software in Windows (explained above) you are immediately greeted with a new window that says “You must initialize a disk before local disk manager can access it”:
- The tutorial linked below should be chosen if your hard drive was previously formatted for MacOS but you would now like it to be a Windows formatted hard drive:
How to Format a New (or Previously Used) EXFAT or FAT32 Hard Drive to NTFS Filesystem for Windows
How to Format a Brand New “Uninitialized” Hard Drive for Windows.
How to Format a MacOS Formatted Hard Drive to NTFS Filesystem for Windows.
How to Format a New (or Previously Used) EXFAT or FAT32 Hard Drive to NTFS Filesystem for Windows.
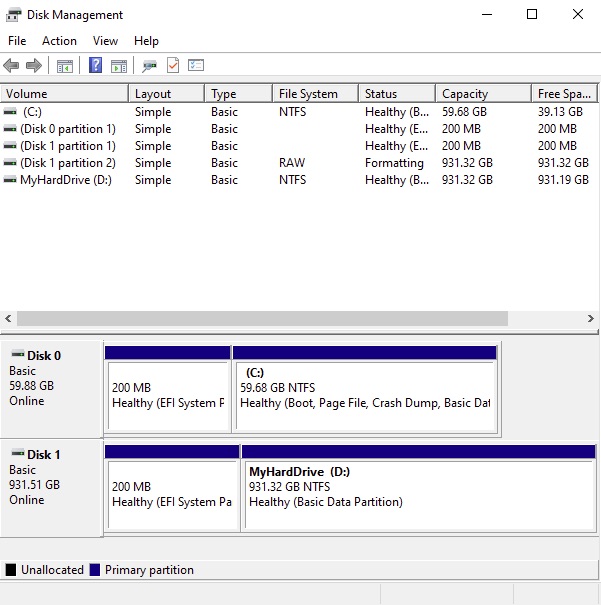
Step 1) Focus on the bottom area of the Disk Management window (the area with the blue bars). The “C:” drive is always reserved for the main system drive, so your external hard drive is most likely listed as a later alphabetic character and lower area in the bottom area of this window. In this example the D: drive is a 1TB external hard drive:
Step 2) Right-click on the partition area for the external hard drive (the box/area that has the blue bar shown below):

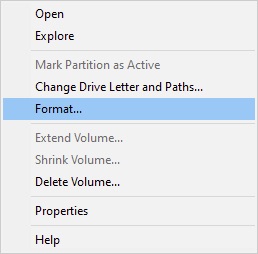
On the right-click menu choose “Format…”:
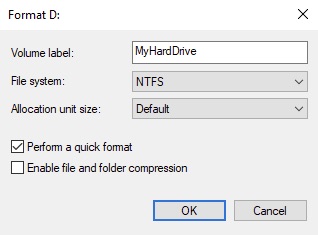
Step 3) You will see this new dialog box. Give the hard drive the name of your preference (MyHardDrive was used as an example here). The other settings should match this screenshot:
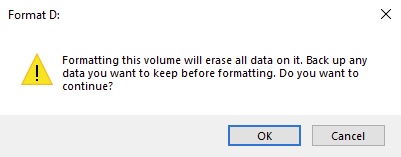
Step 4) You will be given a warning dialog box confirming the format because it will permanently erase any data on the hard drive:
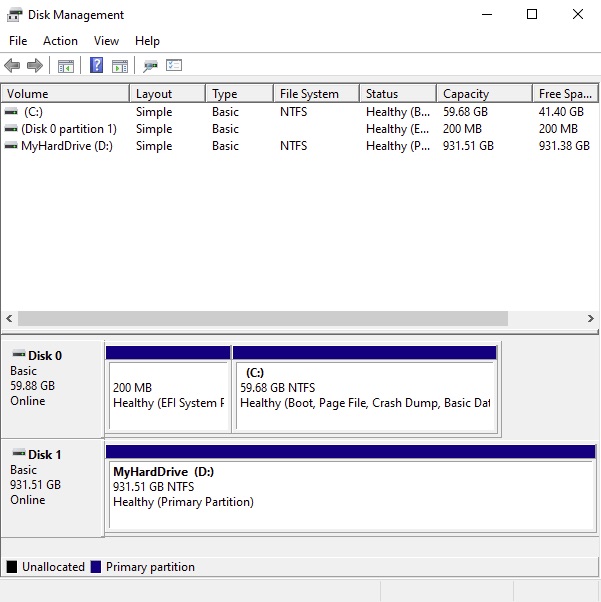
Step 5) After formatting the view within Disk Management should look similar to this. Note that the external drive (D:) is now properly listed as NTFS instead of exFAT:
How to Format a Brand New “Uninitialized” Hard Drive for Windows.
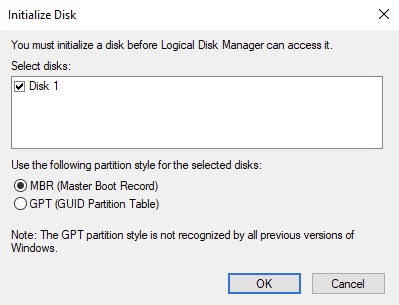
Step 1) When Disk Management is opened and an uninitialized disk is plugged into the computer you will immediately be greeted with the below window. If the drive is 2TB or smaller, it is best practice to select MBR (Master Boot Record). If the drive is over 2TB in size, then GPT (Guid Partition Table) should be chosen. In this example we are formatting a 1TB hard drive, so MBR was chosen. Note: MBR also has better support in earlier versions of Windows if that is important to you, however MBR does not support hard drives larger than 2TB in size:
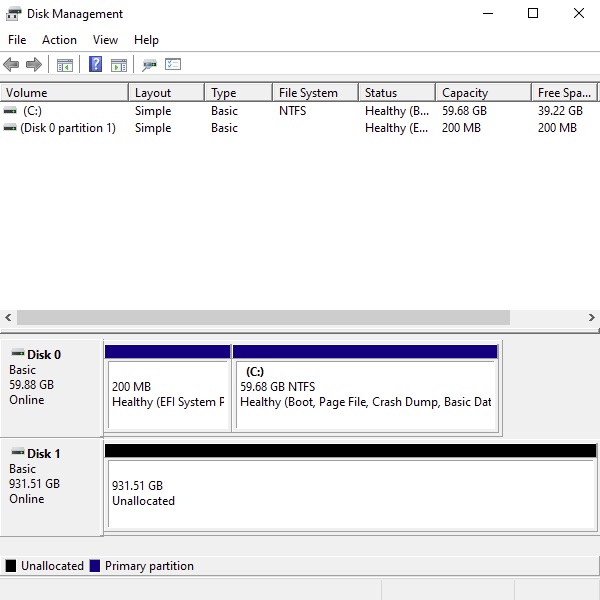
Step 2) Now within the main Disk Management Window, at the bottom are of the window, you should see your new hard drive listed with the term “Unallocated” next to it. Be sure to avoid “Disk 0” or anything next to the “C:” drive since that is your main boot drive. The new drive should span the entire window and look like this:
Step 3) Right-click in the “Unallocated” box area shown below:

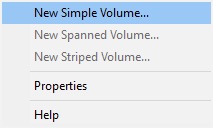
On the right click area choose “New Simple Volume”:
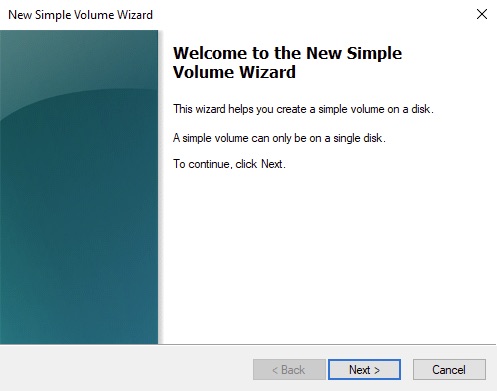
Step 4) The New Simple Volume Wizard will open, click next:
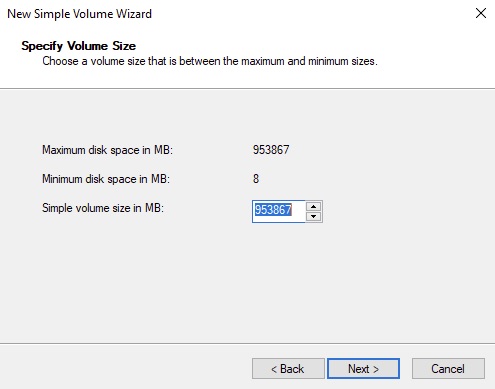
Choose a drive size in this window. The most practical is to always have it match the maximum disk space available:
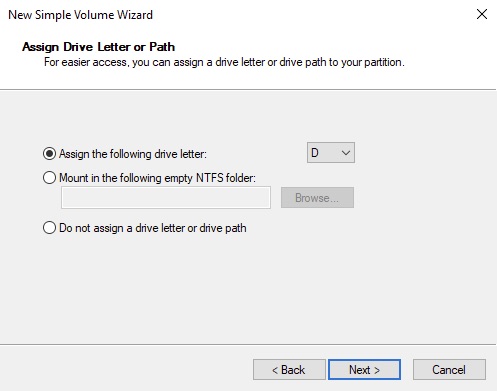
Step 5) Choose the first option here and select a letter for the drive. In this tutorial we chose D:
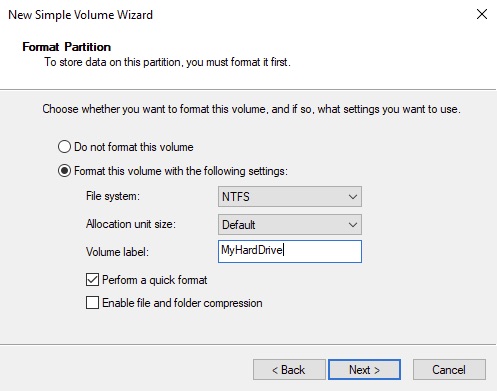
Step 6) In the next Window choose the following options and give the drive a name under Volume Label. In this example we choose the name “MyHardDrive”:
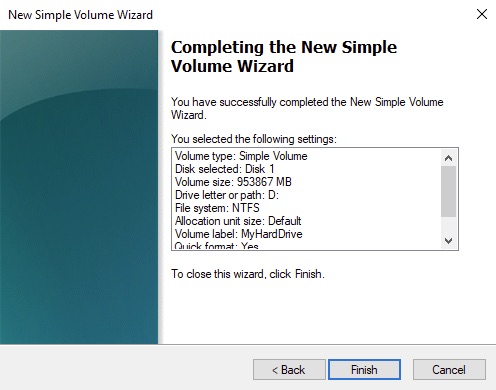
Step 7) If the formatting worked successfully then you will now see a confirmation that the wizard is now complete. Click Finish:
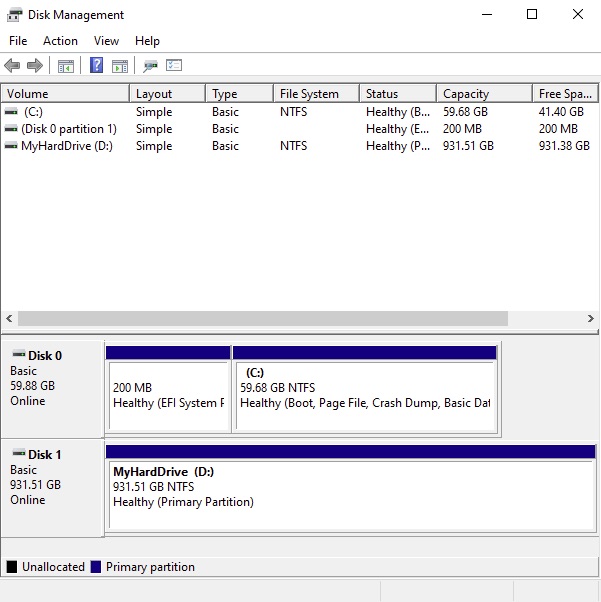
Step 8) The view within Disk Management should look similar to this. Notice at the bottom that the external drive (Disk 1) is now properly listed as NTFS and a “Healthy (Primary Partition)” instead of “Unallocated”:
How to Format a MacOS Formatted Hard Drive to NTFS Filesystem for Windows.
Step 1) With your MacOS formatted hard drive plugged in and Disk Management open in Windows, the view should be similar to the below screenshot. Focus on the bottom area of the Disk Management window (the area with the blue bars). In this example Disk 1 is the external MacOS formatted hard drive, whereas the main computer hard drive is Disk 0 (C: drive). One giveaway that Disk 1 is the MacOS formatted external disk is that it does not list a filesystem next to the storage space for the main partition (e.g. it does not list NTFS, exFAT, or FAT). The other giveaway is that it has both a 200MB partition at the beginning, and another 128MB partition at the end. To be extra certain you are selecting the correct drive/volume, confirm that all other hard drives, other than the main system drive, are currently unplugged from the computer:
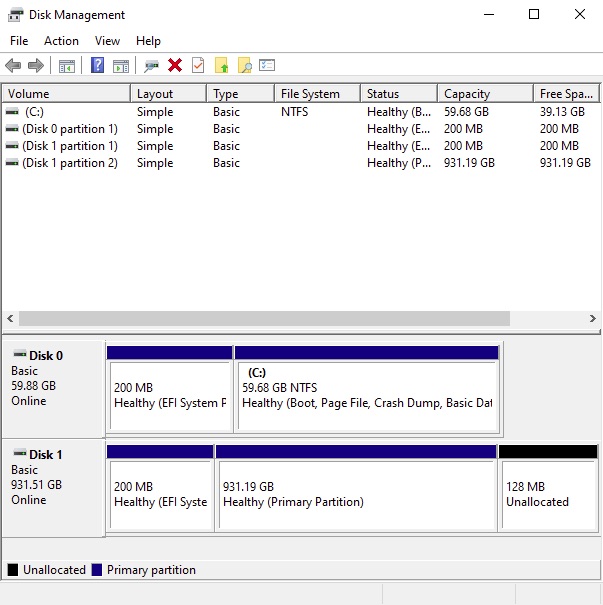
Step 2) Once you are confident which drive listed in the bottom section of the Disk Management window is your external MacOS formatted drive, right-click where it says “Healthy Primary Partition” for the Mac Drive (Disk 1 in this example):

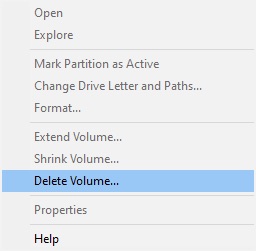
On the right-click menu choose “Delete Volume”:
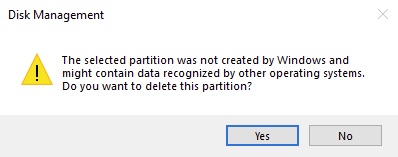
Step 3) You will now see a new window saying that the partition was not created in Windows. If you’re confident this is the correct drive and that you have a backup of your data click “Yes”:
Step 4) The view of the previously formatted Mac Drive should now look like this with the majority of free space appearing as “Unallocated”:

Removing the small EFI partition from when this drive was a MacOS formatted hard drive is complex and it is simpler to just disregard at this point.
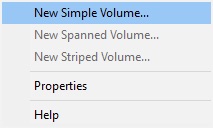
Step 5) Right-click in this “Unallocated” area and choose “New Simple Volume”:
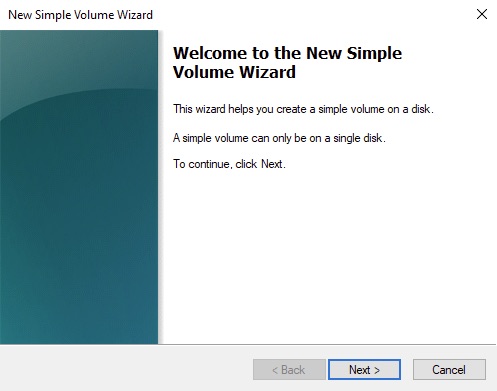
Step 6) The New Simple Volume Wizard will open, click next:
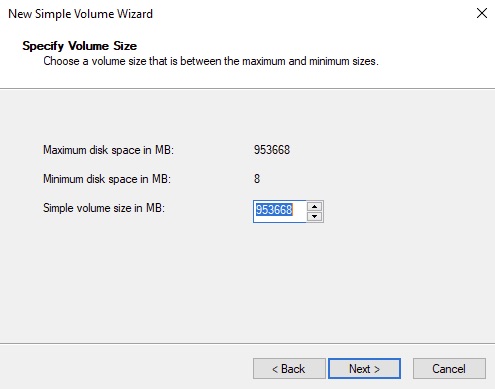
Choose a drive size in this window. The most practical is to always have it match the maximum disk space available:
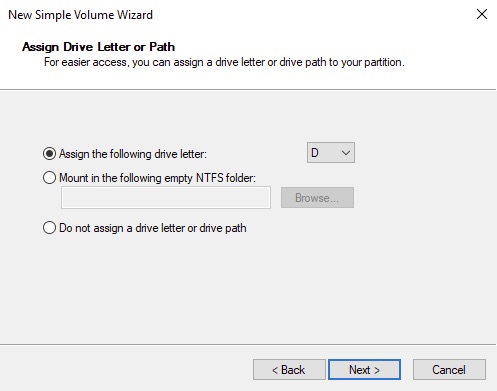
Step 7) Choose the first option here and select a letter for the drive. In this tutorial we chose D:
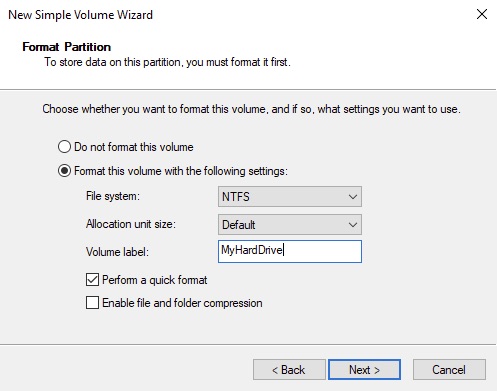
Step 8) In the next Window choose the following options and give the drive a name under Volume Label. In this example we choose the name “MyHardDrive”:
Step 9) If the formatting worked successfully then you should now see a confirmation that the wizard is now complete. Click Finish:

Step 10) After formatting the view within Disk Management should look similar to this. Note that the main partition on the external drive (D:) is now properly listed as NTFS instead of having no label at all:
