Understanding the Basics of Color Correction in Adobe Premiere Pro
Initial Setup:
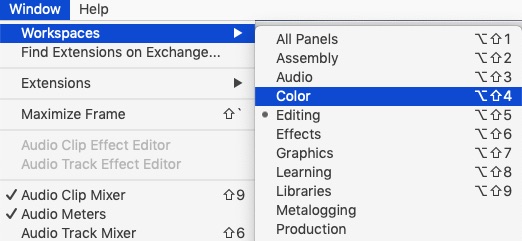
To use the color correction interface (also known as Lumetri) in Adobe Premiere Pro, navigate to Window > Workspaces > Color.
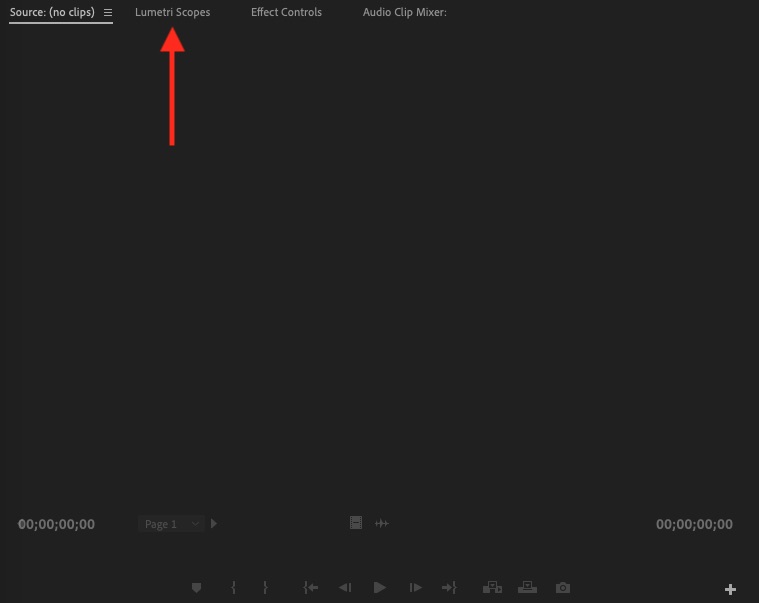
Next, enable the scopes (Vectorscopes) view by clicking on the Lumetri Scopes tab next to the Source panel.
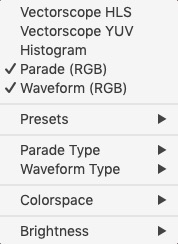
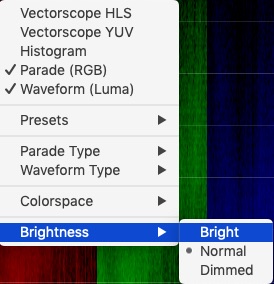
Next turn on these two scopes by right clicking anywhere in the Lumetri Scopes panel and choosing Waveform RGB and again for Parade RGB.
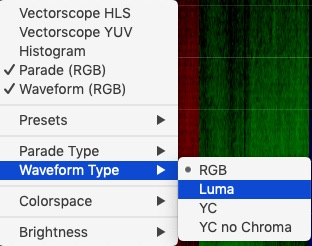
Right click again in the Lumetri Scopes panel and choose Waveform Type > Luma.
Right click again in the Lumetri Scopes panel and change Brightness setting to Bright.
These two scopes we’ve chosen are good starting points for basic color correction for the following reasons:
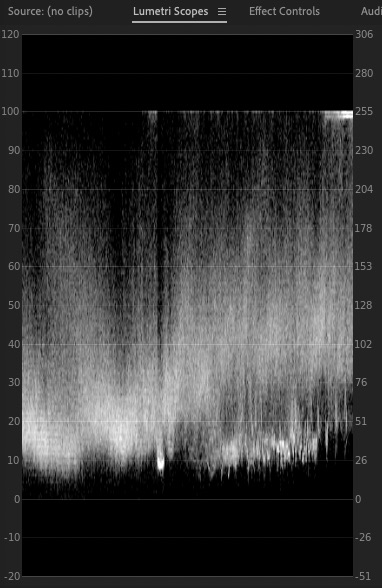
The Waveform scope set to Luma can be used to tell if an image is lacking contrast, or has lost detail in the shadows and highlights. The basic sliders (except for white balance and tint) can be used to resolve any problems here.
A Healthy image will typically have data (represented by white pixels) near 0 to ensure that the darker points are in fact near black, and the brightest areas go up to but do not exceed the 80-90% area to ensure that the image is bright, but is not overexposed.
For example, the below image shows is that color correction is needed to darken areas of the image to have true shadows so that data is nearer to the 0 value (on the left-hand side), however, the image also has some overexposure issues due to there being bright data all the way to the 100 value (on the left-hand side).
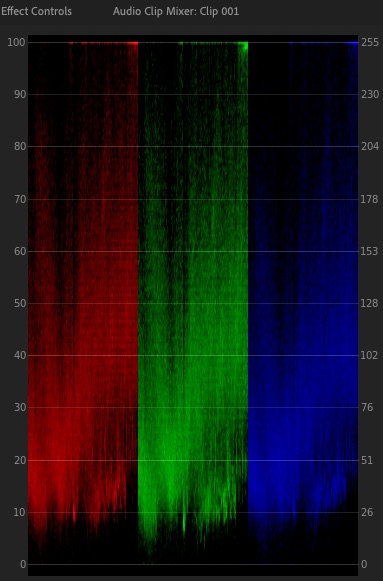
The Parade (RGB) scope can show if the image has a white balance/color balance issue of any kind. This typically is visible by the Red or Blue channel being too high or low in relation to each other (not equal levels). The white balance and tint sliders in the basic panel can be used to resolve any problems here.
For example, the below image shows is that color temperature of this image is fairly well balanced because the red and blue channels are very similar value (in terms of data represented in height on the chart). The red channel has just slightly more height, so you could try adjusting the white balance on an image like this to a cooler temperature in attempt to completely match the red and blue channels data height on this image and have more neutral colors:
Understanding the adjustments in the Basic Correction panel:
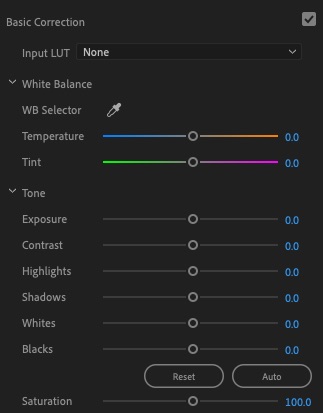
White Balance: The overall interpreted color temperature of an image/video file.
Temperature: Adjusting this will make the image either warmer (orange/yellow) or cooler (blue) toned. Slide this until the image feels neutral in tone (not too warm, and not too cool).
Tint: Adjusting this will add/remove either the red/magentas or greens. Slide this until the image feels neutral (does not have a red/magenta or green tint).
Exposure: Adjusting this will change the overall brightness of the image.
Highlights: Adjusting this will mostly change the lighter areas of the image.
Shadows: Adjusting this will mostly change the darker areas of the image.
Whites: Adjusting this will change the darker areas of the image; similar to “Highlights” adjustment but more specific to the very lightest areas.
Blacks: Adjusting this will mostly change the darker areas of the image; similar to “shadows” adjustment but more specific to the very darkest areas.
Saturation: This will increase the color saturation of an image. This is typically too dramatic of an effect and it is usually preferred to go to the “Creative” section located below the “Basic” section of the color correction panel and use the vibrance slider instead.
Copying and pasting the same color correction onto multiple clips:
To copy and paste a color correction effect from one clip to another select (click on) the primary clip in your sequence to select it, then navigate to Edit > Copy.
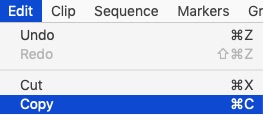
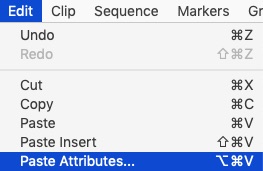
Next select (click on) the destination clip where you want that same correction to be applied to and then choose Edit > Paste Attributes.
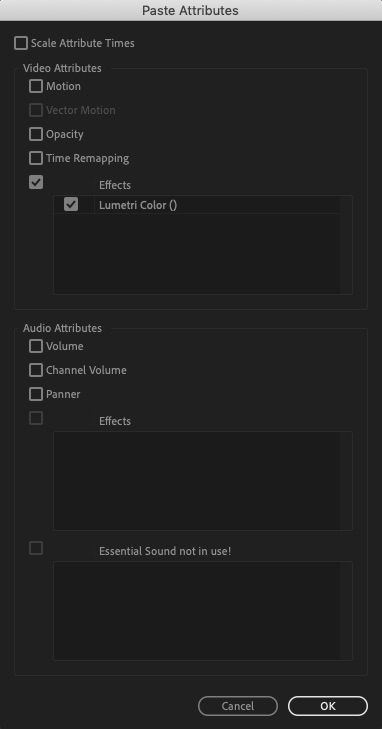
In the window that then appears, uncheck every box except for Effects and Lumetri sections for the lumetri correction to be pasted (as shown below) and then click OK:
Note: please see the next section to avoid duplicate color correction effects.
Understanding how Adobe Premiere Pro stores color (lumetri effects):
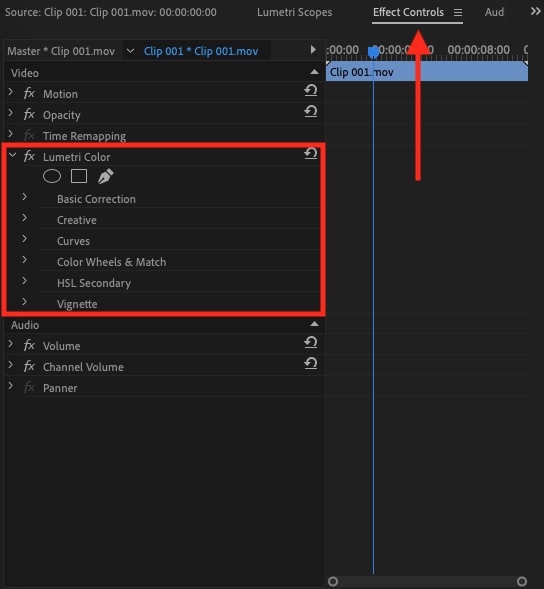
Premiere Pro stores color adjustments as an effect that is attached to a clip. It is good to get familiar with this so as to not accidentally have multiple instances. To see the location of the effect double click on a clip in the sequence which will load it into the Source monitor (top left of screen). Next, navigate to the Effect Controls tab. The section that says Lumetri Color is your actual color correction effect. Note that if you have copied and pasted multiple effects from other files, you will want to remove any extra duplicates and just have one Lumetri Effect. This can easily be done by selecting the extra Lumetri Color effects and pressing the delete key on the keyboard.
Using Adjustment layers:
To solve some problems with the color correction tools it requires you to take multiple passes/adjustments on the same clip. Rather than have multiple Lumetri effects on the same clip (which causes problems) it is best to use adjustment layers. Adjustment layers simply serve as a transparent/empty layer above your video track that additional video effects can reside on which affect the clip(s) below.
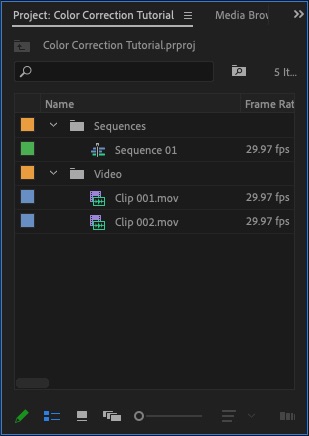
First, Click on (highlight) your project panel (bottom left of interface). you will know it is highlighted because it will have a blue outline.
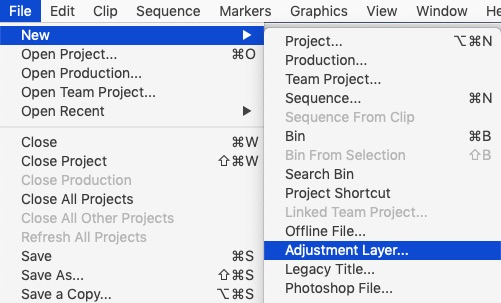
Next choose File > New > Adjustment Layer.
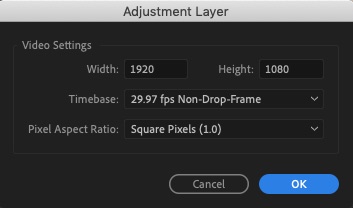
This will bring up a new window that will allow you to adjust the properties of the adjustment layer. Typically this matches your sequence settings automatically and you can simply select OK. Your properties do not need to match what is shown here.
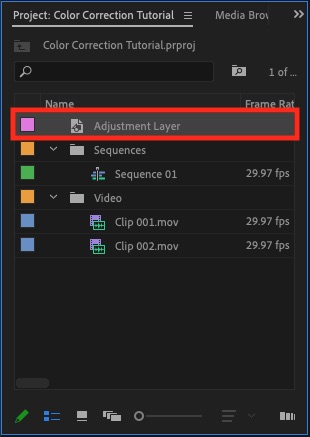
The adjustment layer will now appear in your project panel.
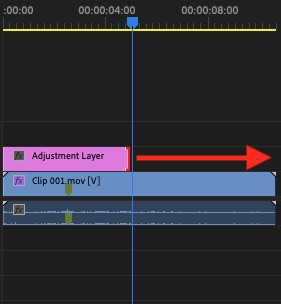
Drag and drop the adjustment layer onto a track above the clip that you want to apply the additional color correction effect onto. The adjustment layer will come in at a default duration of five sections, so you will likely need to use the main Selection tool in Premiere Pro and click and drag on the left or right edge of the adjustment layer to extend or shorten it to match the clip length, as shown below:
Once the adjustment layer has the correct length, click on it to make sure it is selected. From here, you can now apply an additional correction that will affect the clip below using this adjustment layer.
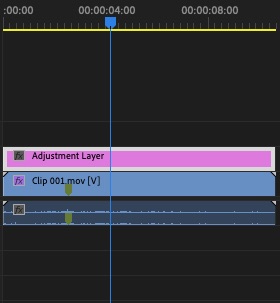
Note: The adjustment layer must remain highlighted (selected) while you perform your color corrections using Lumetri tools for the effect to go onto the adjustment layer rather than the clip below it.
You can double-click on this adjustment layer and look at the Effect Controls tab to confirm that the color correction was applied to this adjustment layer correctly (as described above in the section “Understanding how Adobe Premiere Pro stores color (lumetri effects)”.
Understanding the Goals/Workflow of color correction and when to use Adjustment layers:
First Pass: This should be the initial color correction to be completed on actual video track(s) in the sequence. This would cover basic exposure/white balance adjustments.
Second Pass: The goal of the second pass is continuity. This pass you should color correct your clips further, looking at the neighboring clips in your sequence and consider if tones from clip-to-clip match. This can either be accomplished using adjustment layers (in more severe cases), or on the original video track/clips if the changes needed are simple.
Optional Third Pass – adjustment layers recommended: Expression. This third pass is for making more intense changes to the color correction, such as adding color tint to certain areas of the image using a tool like the color wheels or RBG curves. Another example of this would be replacing a color entirely using HSL secondary panel, or the Hue/Saturation curves. (Note that these are more advanced techniques not covered in this tutorial).
Optional Fourth Pass – adjustment layers recommended: Format specific/broadcast safe (blu-ray, etc). This fourth pass is option and is only needed when you know your destination of your film will need adjustments made to the color to compensate for a technical issue. Adjustment layers would be most practical for this.
Questions to ask yourself while color correcting:
Are there details in the darkest areas (shadows)?
Are there details in the lightest areas (highlights)?
Does the skin tone look natural?
Is there enough contrast/does the image “pop”? (is there enough depth and detail)?
How does the color make you feel?

