Importing Sony FS100 / EA50 (AVCHD Media) into Adobe Premiere
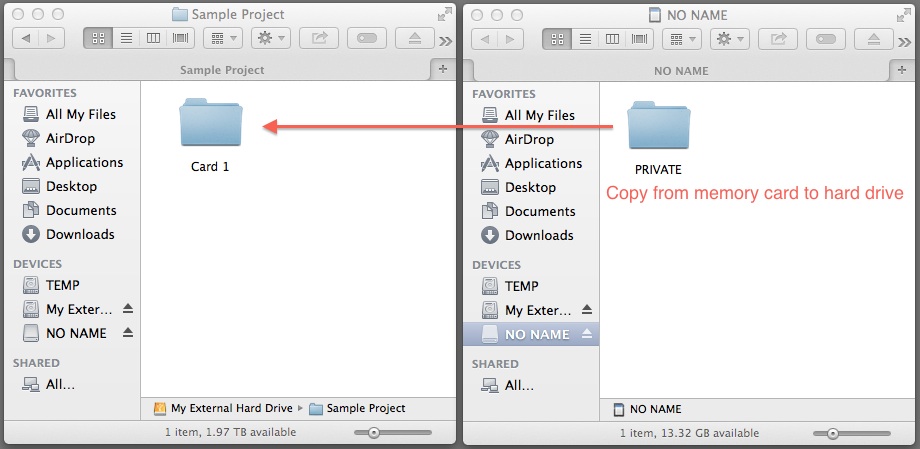
Step 1) Copy your memory card contents (typically a folder called “PRIVATE”) to your hard drive.
IMPORTANT NOTE: When copying be sure to copy the entire “PRIVATE” folder and not just the “.mts” files. Also DO NOT RENAME THE .MTS.
Be certain to copy the private folder into a folder on your hard drive which describes the footage, rather than just copying it to the root level of your hard drive:
If you are making a long form project (anything longer than 10 minutes), we recommend following our Using Adobe Prelude CC to Transcode AVCHD footage to Apple ProRes. workflow at this step. If not, continue below:
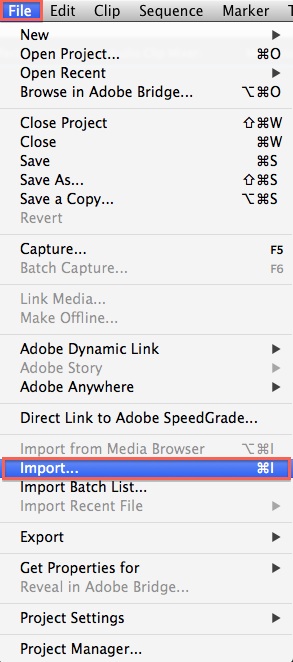
Step 2) Open Premiere and navigate to File -> Import:
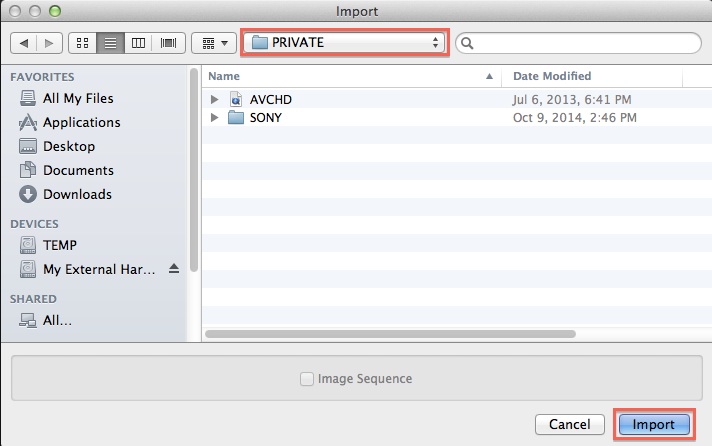
Step 3) Browse to the location of your media on your external hard drive (not sd card). Select the “Private” folder and import that:
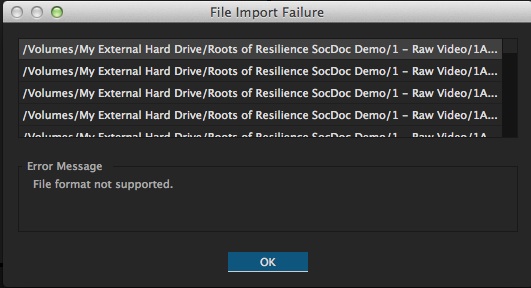
You may receive an error message about not being able to import certain files types. This is common when importing AVCHD footage (the format which our Sony EA50 and FS100 capture in) because it can’t import the camera-generated thumbnail files. It should not concern you:
Step 4) Once imported, your clips may come in with a folder structure which does not clearly identify the group of media. It is best practice to either rename the folders which it came from, or make a new folder (highlighted in red below) to relocate that media into. You can simply drag and drop the clips to move them into a new folder: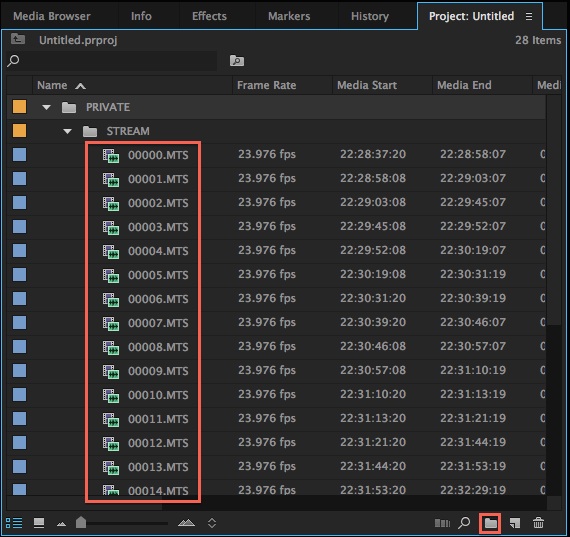
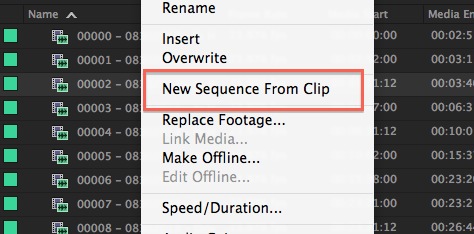
If this is your first time using Premiere with this footage, it is always best practice when starting a project to make a new sequence by right-clicking on a clip in your bin, and choosing “New Sequence From Clip”. This will guarantee that your sequence matches your clip specifications:
Also try downloading our Default Premiere Folder Structure Template when starting a new Premiere Project. This can be used to serve as a template for you to insert media into on your hard drive prior to starting a new project which can greatly help you stay organized.

