Burning a DVD with Compressor 4
This workflow covers creating a simple one film video DVD. It is not possible to burn two films onto one video DVD in Compressor, so it is important if you are burning more than one film that you have multiple DVD’s to do so (for example, when submitting DVD’s for portfolio review to the department).
Note: this tutorial assumes you have already made a high quality export (.mov) file of your film.
In Final Cut X: this can be done very easily using the File > Share > Master File command.
In Adobe Premiere, please follow this tutorial to prepare a .mov file for creating DVD’s. Once you have created your .mov file, please come back to this page and follow the below instructions to burn a video DVD.
Step 1) Open Compressor 4 by clicking on the icon in the Dock:

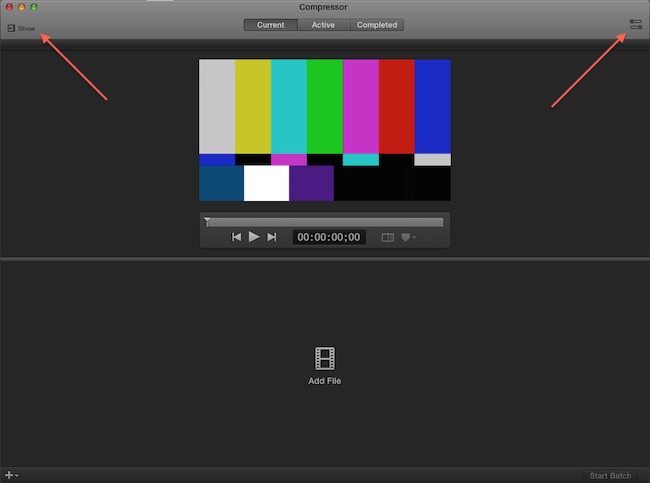
Step 2) Click on the Show button and Inspector button on the left and right hand side of the main window as shown here:

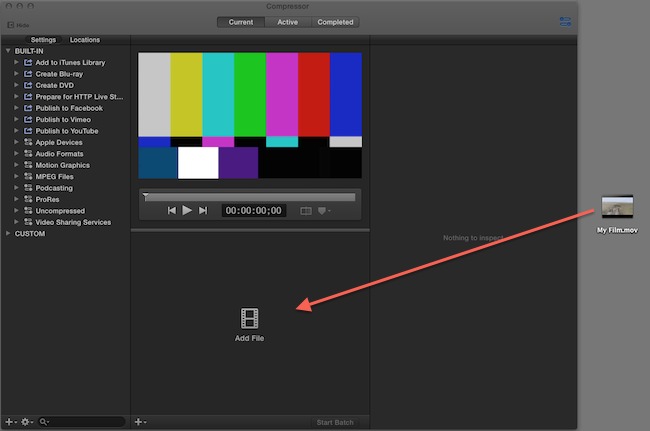
Step 3) Drag and drop your .mov file into the center of the Compressor window where it says “Add File”:

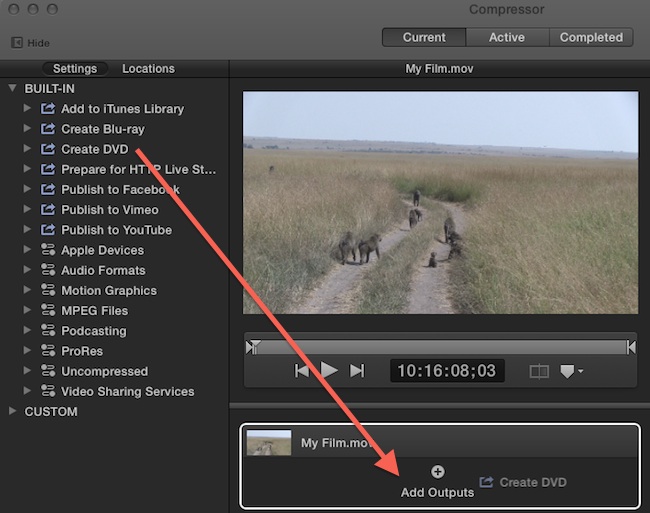
Step 4) Drag the “Create DVD” preset from the settings window onto your mov file that you added in the previous step.

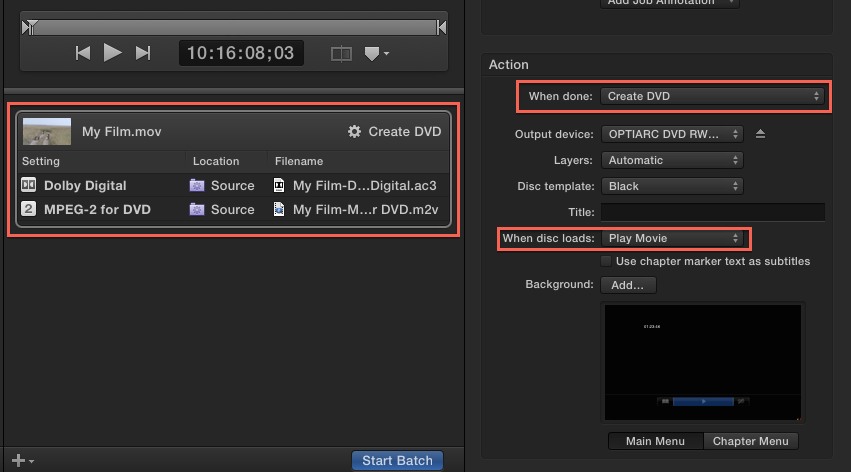
Step 5) Make sure that the mov file you dragged in is the active selection by clicking anywhere on the light gray area next to the thumbnail. Next, verify that “Create DVD” is selected as the option for “When Done”, and also that “Play Movie” the choice for the “When Disc Loads” drop down menu:

Step 6) Insert a blank DVD into the DVD burner, and click the “Start Batch” button:
![]()
When the disc is finished, you can re-insert it into the drive to verify that it plays back correctly. DVD’s inserted into our computers will automatically launch the application DVD Player.

