
Synchronizing Dual System audio using PluralEyes 4
Step 1) Open Plural Eyes in the Dock by clicking on its icon: ![]()
Step 2) Locate the movie and audio files which have a relationship. Be sure to do just choose just one day or event at a time. First drag the movie files into the main window:
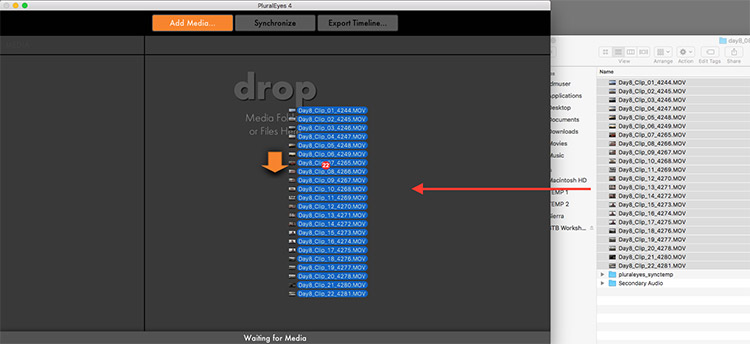
Note that Plural Eyes may need a few minutes to process them.
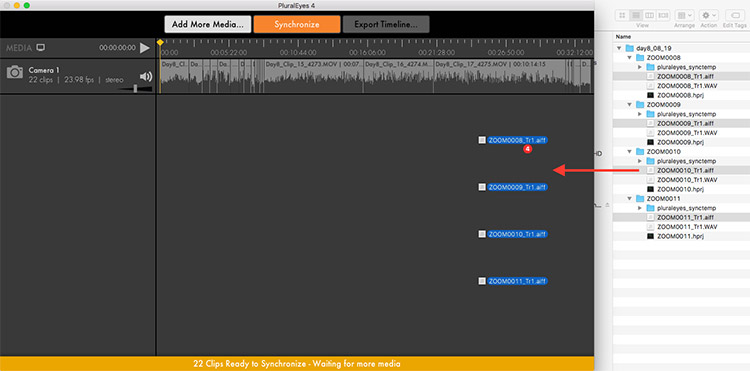
Step 3) Next drag in the audio files into the same window:
Technical Note: Secondary audio files must be the same sample rate as your camera files or you will run into technical issues in Premiere. To check this, open any of the audio files in Quicktime on a Mac computer, and press Command + I. If the sample rate is not listed as 48,000hz or 48kHz you will need to convert the files before using Plural Eyes. Please refer to our workflow for Using XLD to Convert Audio to 48kHz if you are in this situation.
Step 4) The Plural Eyes window should look something like the screenshot does below depending on how many sources you have. Press the Synchronize button to begin the syncing process. This can take a few minutes so be patient:
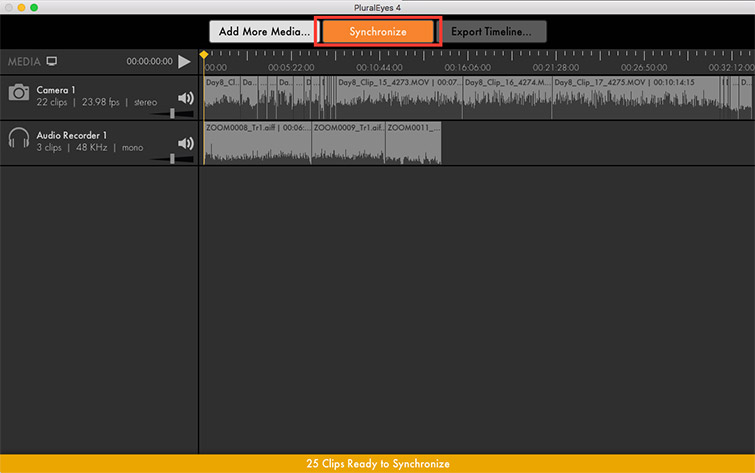
Step 5) If Plural Eyes found matches for the audio it will flag the clips as blue and align them correctly. Any clips labeled as red indicates there was nothing found to synchronize. Click “Export Timeline” in this window:

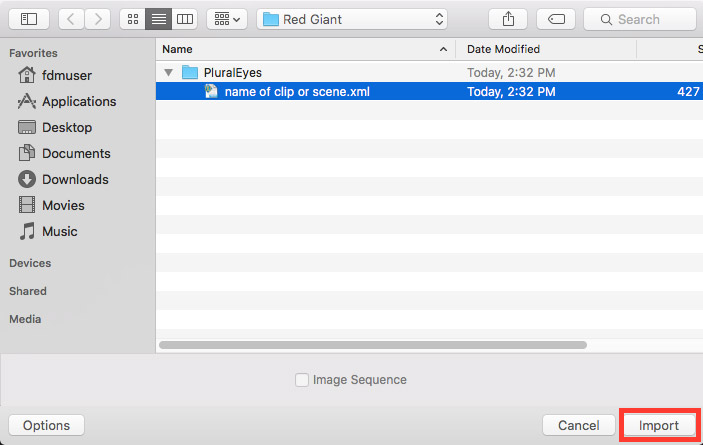
Step 6) In the dialog which pops up give your XML file a unique name by clicking on it, and then choose the following settings and click Export:
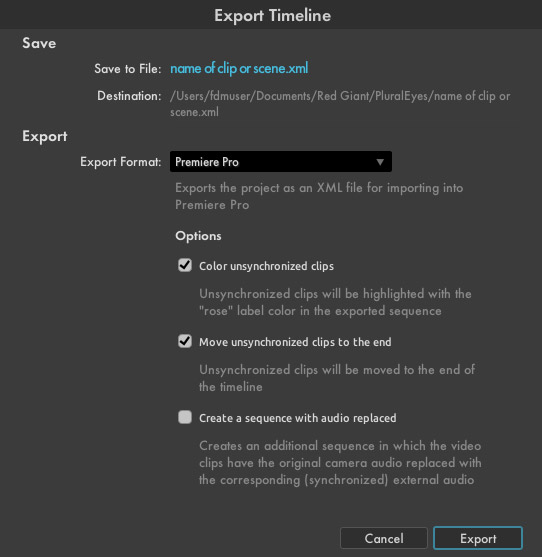
Note that in this example I gave the XML file it is saving a very generic name as an example, however you will likely want to be more specific, naming it the name of your scene or something to describe the collection of media.
Note that it will save the XML file into a generic location on the computer (Documents folder). Make a mental note of this for when you’re importing it into Premiere.
Step 7) Open your Premiere project file (or make a new project if you are just now starting) and choose File > Import (or press Command + I). In the new window which opens, locate and open the XML file from Plural Eyes within the Red Giant folder in the computer’s Documents folder (Hint: The shortcuts to the Documents folder is on the left-hand side bar of the computer):
Step 8) When choosing an XML file for import, Premiere will import all the secondary audio clips and a synchronized sequence file. Please note that even if you have already imported the camera media files into Premiere, it will sometimes import a duplicate set of your camera files even if they already exist within your project files. If this is the case, you will need to delete the duplicates for the sake of keeping your media organized. If you have not imported your camera files yet, then leaving the ones which Premiere brings in with the XML file is fine:
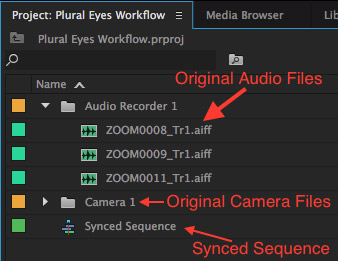
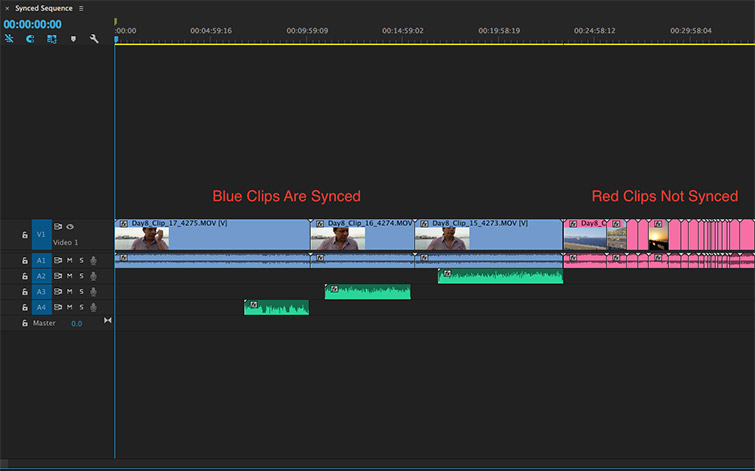
Step 9) Spend a little time organizing these imported assets if you need to, and then open the “Synched Sequence” file. Upon opening it, you will see that this contains your synced clips in one timeline, along with the non-synced clips highlighted in red:
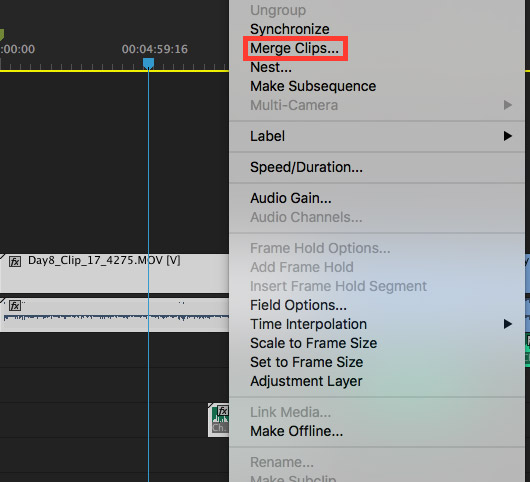
Step 10) Now you will begin to make merged clips. In this Sycned Sequence, select a clip, along with it’s secondary audio sources below it, right click, and choose Merge Clips:
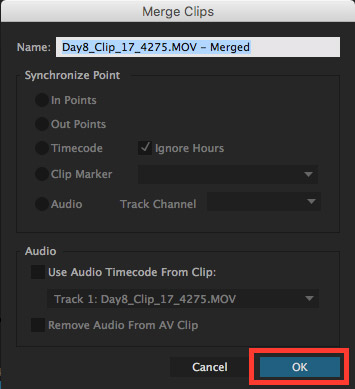
Step 11) In the window which opens choose these settings (you do not need to change the name):
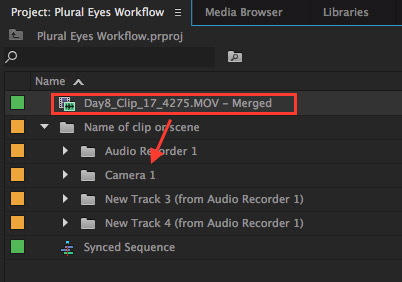
Step 12) You will see the merged clip appear in your main project bin in Premiere. This is the file you will use to edit with from now on because it contains the clip you selected along with your secondary audio source(s) into one file. It is best practice to move the merged clip file within your main media folder to keep organized. This way you can use the synchronized clip, or the original file to edit with as needed:
You will need to repeat this merged clip workflow for every clip that has secondary audio matching it coming out of your Plural Eyes project in the Synced Sequence. The next step would be to select the next clip down the sequence, and make a merged clip of that, and so on.
Summary of Workflow:
1. Import assets into Plural Eyes.
2. Synchronize.
3. Export the XML File out of Plural Eyes.
4. Import the XML File into Premiere.
5. Use Synchronized sequence to generate merge clip files.