
Exporting AVID DNxHD in Adobe Premiere for Screening (Windows and Premiere 2018 or earlier only)
IMPORTANT NOTE: This workflow is now antiquated and only applies to version 2018 and earlier of Adobe Premiere. For exporting with Premiere 2019 or newer in Windows it is recommended that you follow this workflow instead: Exporting ProRes Media in Adobe Premiere for Screening/DVD/Blu-Ray.
Step 1) Download and install the AVID DNxHD codec pack for Windows by clicking here: AVID DNxHD codec pack for Windows. This will download as a zip file which you will need to extract, and then double click on the file AvidCodecsLESetup.exe to install.
Step 2) Download and install the AVID DNxHD Media Encoder Presets by clicking here:
AVID DNxHD Presets for exporting on Adobe Premiere in Windows or Mac.
This will download as a zip file. Double click on the zip file to extract the two .epr files. Next open the application Adobe Media Encoder (it comes with Premiere) and choose the menu “Preset”, and then “Import”. Navigate to the two .epr files that you downloaded and import them. Quit Media Encoder.
Step 3)
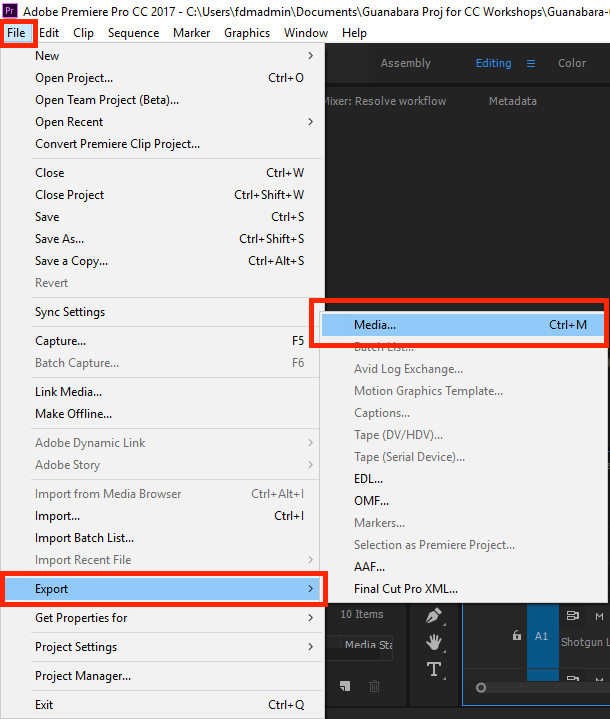
Back in Premiere, with your project open, Choose File > Export > Media:
Step 4)
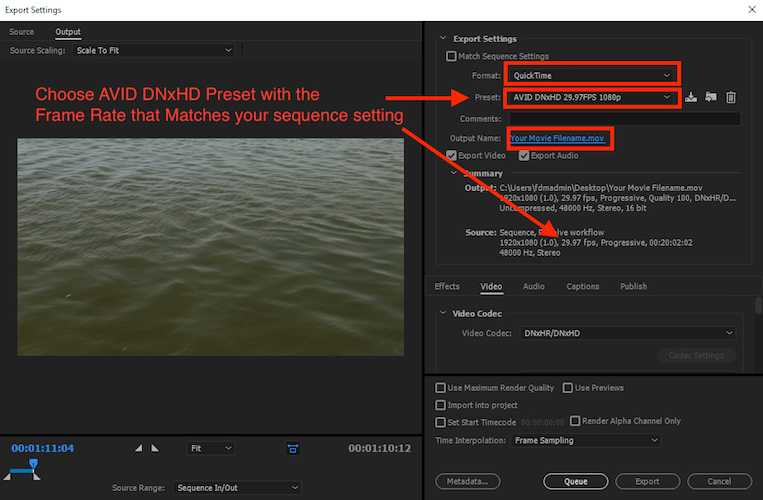
In the export window that opens:
For format, Choose Quicktime.
For Preset, either AVID DNxHD 29.97FPS 1080p or AVID DNxHD 23.97FPS 1080p, depending on the frame rate of your sequence. You can check your frame rate under the Source section of this same window to verify which preset you should use.
Under Output name, click and give you film a unique name, and choose location on your hard drive to save the file.
Lastly, click on “Export.”
Please note, this file type is a high quality screening format which will only play in VLC on newer Mac systems. This is fine for our screenings because we use an older Mac laptop which supports this file format natively within iTunes.