
Optimizing Adobe Premiere Settings/Sequence on Low Performance Computers (or Complex Projects)
This tutorial explains several techniques you can use to to help manage Adobe Premiere projects on lower performance computers or complex projects that involve advanced color correction and/or the use of RAW/UHD media files:
Technique #1 – Quit any unnecessary programs.
It is best practice to not have any other open applications running on the computer that don’t have to be open when you are editing. Even web browsers and media playback software can use a lot of RAM (memory) and the computer’s Video Card. It is important that you quit any other software to ensure that Premiere has all of the computer resources that it can use.
Technique #2 – Adjust the playback quality settings.
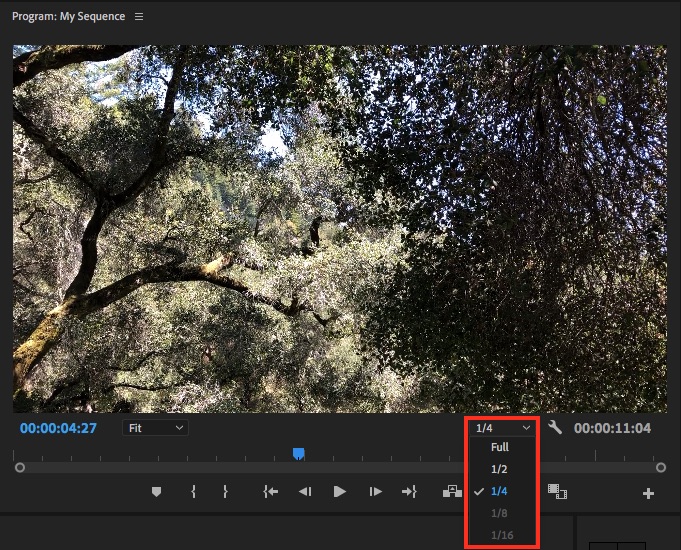
In the Program panel at the top right of the screen there is a drop-down menu that allows you to choose the resolution quality in which the video is being displayed or played back. When working with 1080p footage try lowering this to 1/4 quality. When working with 2k or 4k media, the 1/8 and 1/16 options will be selectable and should be tried for better performance:
Technique #3 – Disable certain effects on clips until you export/perform color correction.
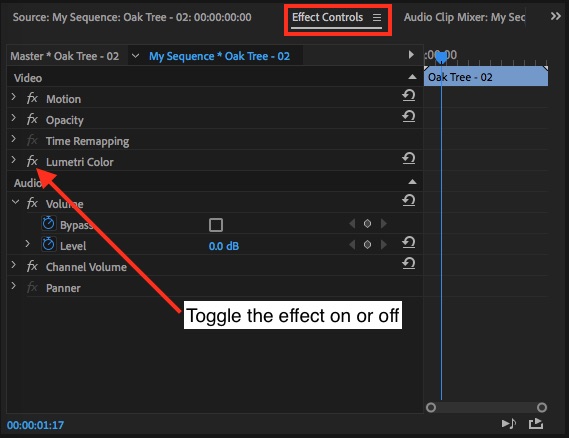
Some effects, such as Warp Stabilizer and the Lumetri color correction, can use a lot of computer resources and may cause Premiere to slow down. If you are trying to edit your film and have already applied any complex effects to your clips, it is best to turn off that effect on the clips until you need to adjust the effects again later, or export your final finished film. To do this, double click on each clip that has the effect (one at a time) and navigate to the source monitor in the top left of the Premiere interface. Next, click on the Effect Controls tab, and then click the “fx” button to toggle the effect off (or back on later). In this example a Lumetri color correction effect “fx” button is being shown:
Technique #4 – Disable/enable clips that do not need to be visible currently.
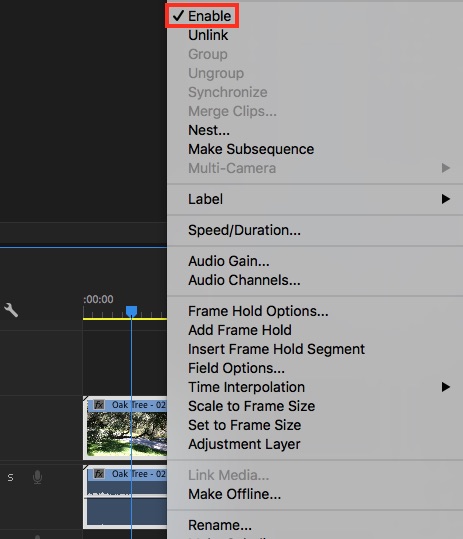
Try disabling any clips in the sequence which do currently not need to be visible for the task you are performing. A great example of using this would be on any clips that have had their size adjusted in the Motion effects control, or if the speed/duration setting was used to make the clip fast or slow motion. To do this on any clip, simply right click on the clip, and choose “Enable”. When you disable a clip it will still be in the sequence but just appear darker. This will make the clip not appear in playback and therefor will help Premiere performance by temporarily not having to process that clip. To turn the clip on again later, simply navigate back to the same menu with a right-click and choose “Enable” again. You can do this to multiple clips at a time by holding down the Shift key to select more than one, and then perform the same right-click menu task:
Technique #5 – Turn off any video/audio tracks until you need them (or export).
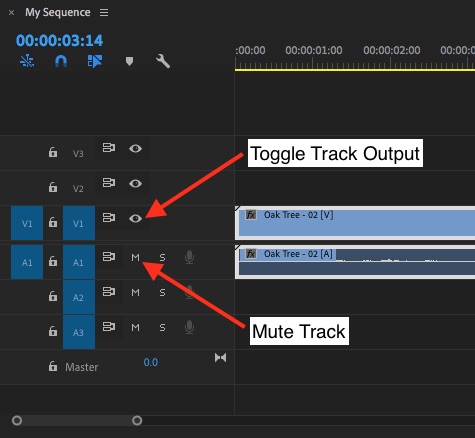
Similar to technique #4 above, but more global, there are two buttons that can be selected when in a sequence to temporarily disable audio or video for an entire track until you need it. To do this, click on either the Toggle Track Output button in the video track section (eye icon), or the Mute button (M icon) in the audio track section. An practical example of using this would be to completely disable a track that had been used for something complex, such as slow motion footage, or a track of adjustment layers that have color correction assigned to them. Another example would be muting an entire audio track that had advanced equalizers or noise reduction effects applied until you export:
Technique #6 – Edit with ProRes or ProRes LT files instead of compressed formats (such as H.264 footage).
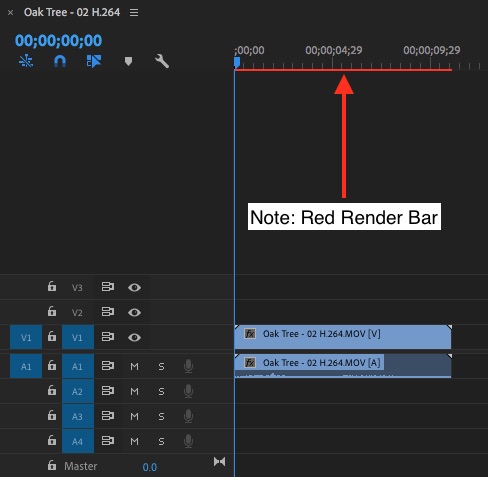
Premiere decodes (processes) different media files with various amounts of performance depending on several variables. Many common media formats (codecs) strain Premiere’s ability to function efficiently. When working with media on a lower performance computer, if you see red render bars (as shown below) when you first bring your media into a brand new sequence, this means that Premiere is struggling to process the media efficiently, and it will require rendering for it to be played back at a reasonable quality. To help avoid this issue, it is recommended to convert that media prior to editing it. Following the workflow Transcode Found Footage/Phone Footage to Apple ProRes with Adobe Media Encoder can greatly help you resolve this issue and optimize the footage for lower performance computers. If followed, the clips may instead appear with a Yellow bar at the top of the sequence, which means Premiere will be able to play it back easier without requiring a render to be performed.
Technique #7 – Use Proxy files instead of clips in their native resolution.
Premiere has the built in ability to generate what are called proxy files. Proxy files are smaller resolution and more compressed versions of your media that Premiere can temporarily reference in an effort to increase performance. The proxy file workflow was been primarily designed to work with 4K and UHD formats for better performance in Premiere, however, it can also be used with 1080p files when using a low performance computer since proxy files can be set to as low as 540p. To learn about a proxy workflow to increase performance in Premiere, please watch this comprehensive youtube video tutorial.